_______________________________________
Needle Timing Alignment for Consew 206RB style machines (works for P1206RB, 206RB-5 and others
Back To The Top
To adjust timing on Consew 206RB style machines Rotary Hook screws need to released, the Rotary Hook aligned with the needle and then secured back on it's shaft. This is also a good time to check the condition of the sharp point of the rotary hook, if it is not perfectly rounded (bent), have a rough to touch surface or it's point is significantly dull - it is a time to get a new Rotary Hook.
(Click on the images to see a larger picture)
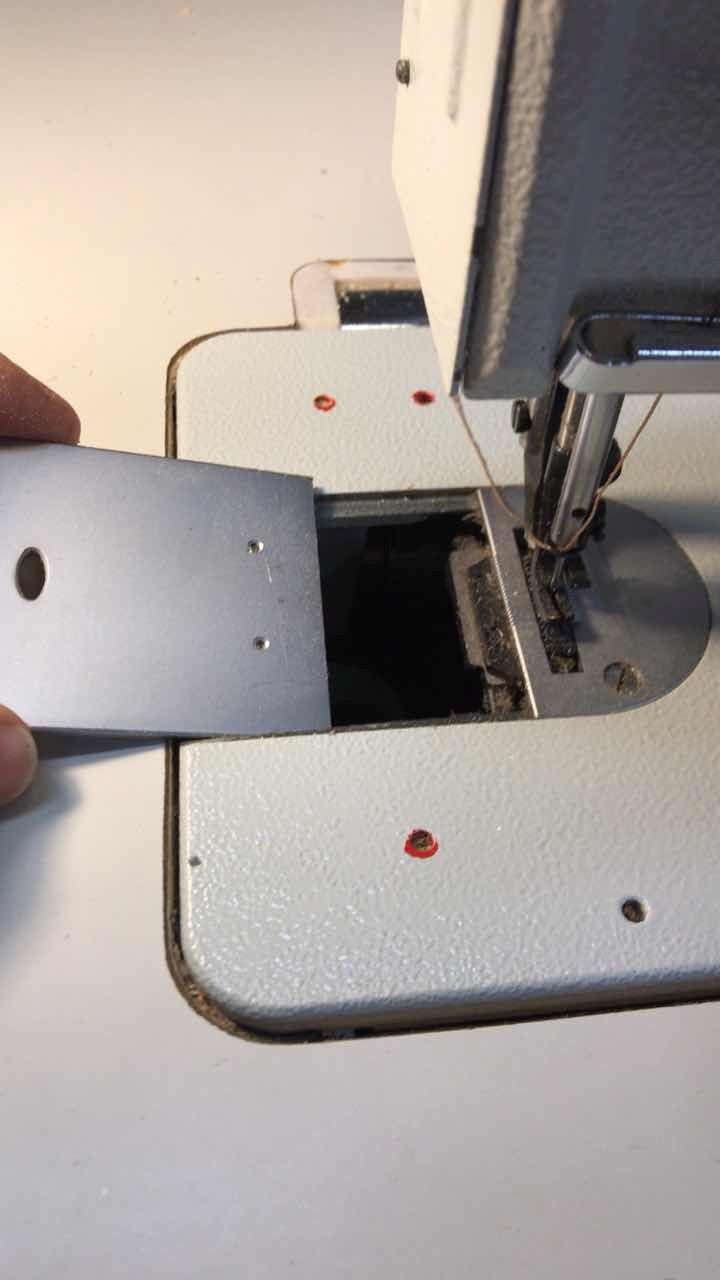
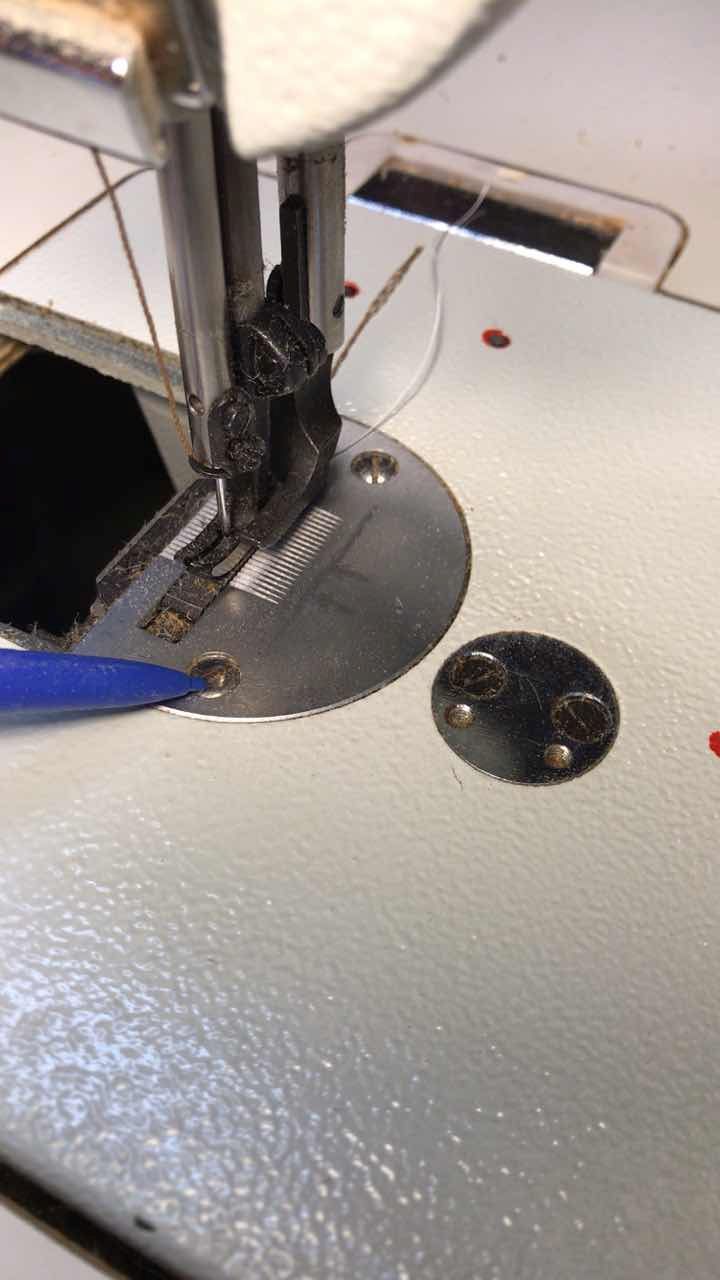
1. Slide away Bobbin Cover Plate and remove Needle Plate by removing 2 screws on it's top.

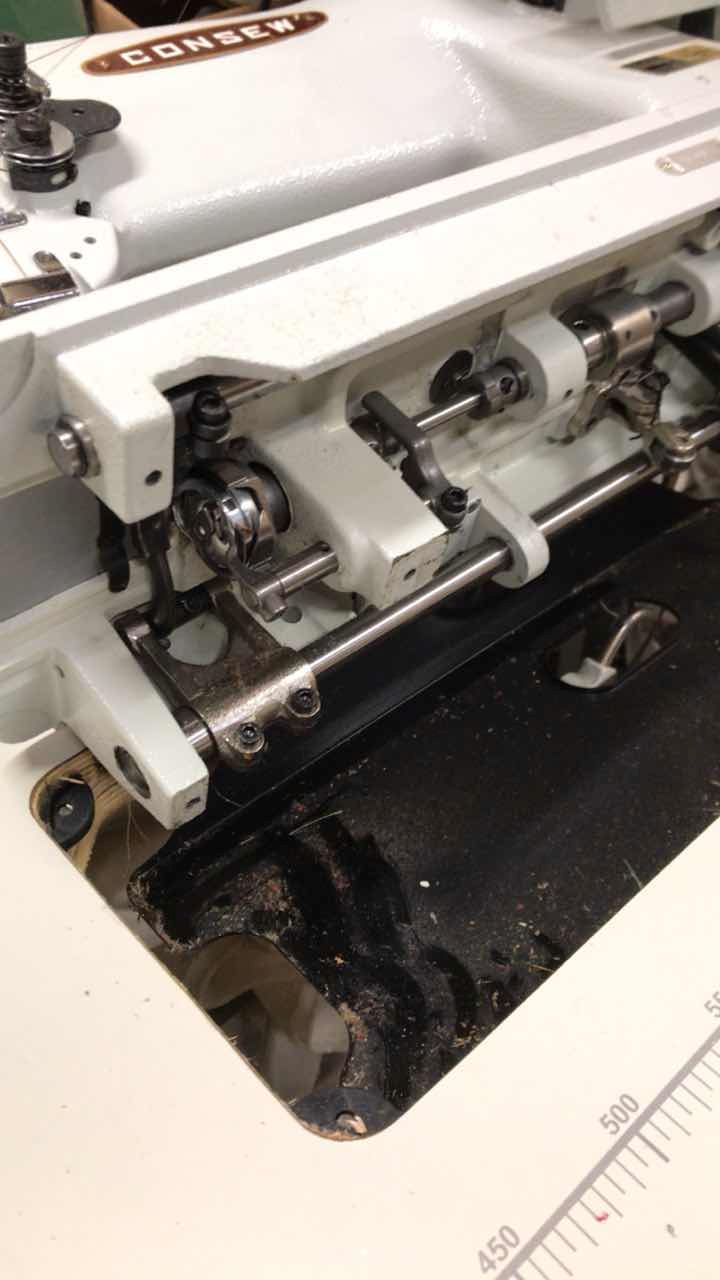
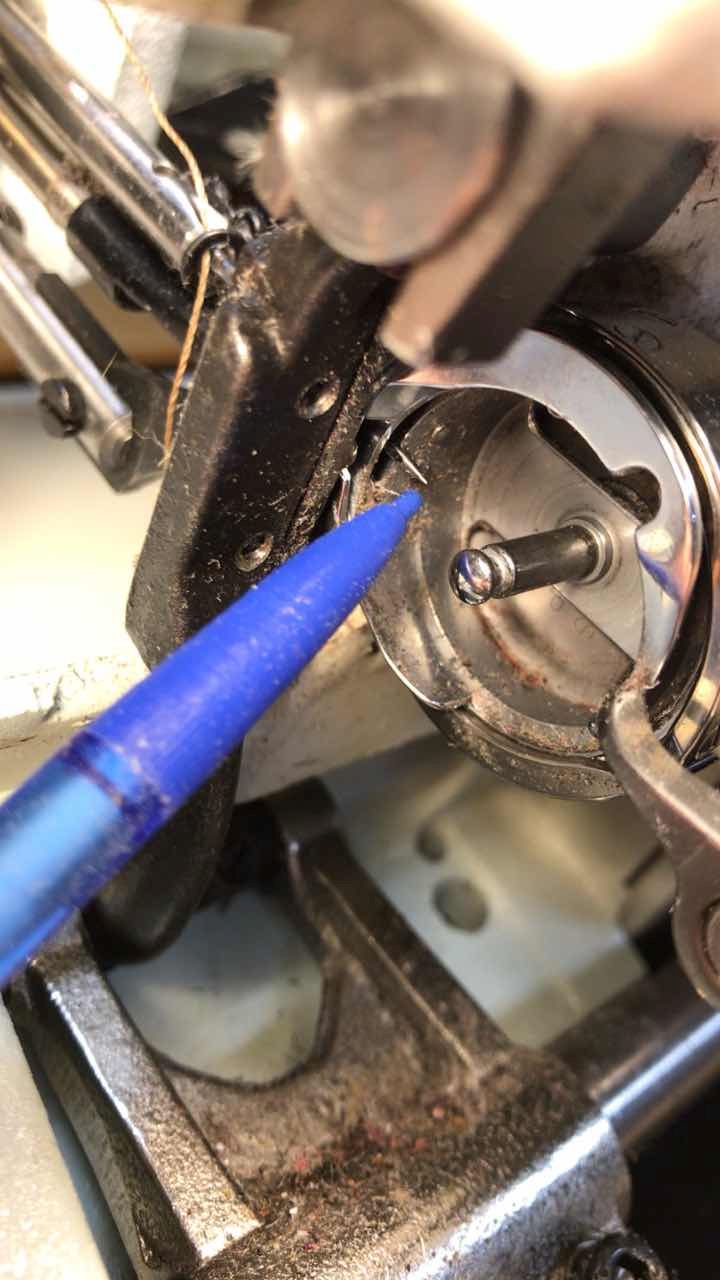
2. Tilt the machine head back to open access to the bottom of the machine. Remove bottom bobbin from Rotary Hook. Check if Rotary Hook sharp point is in good condition - rotate Fly Wheel until the Rotary Hook sharp point is exposed - see pic, inspect it's condition. If it is damaged, order a new Rotary Hook before adjusting timing.
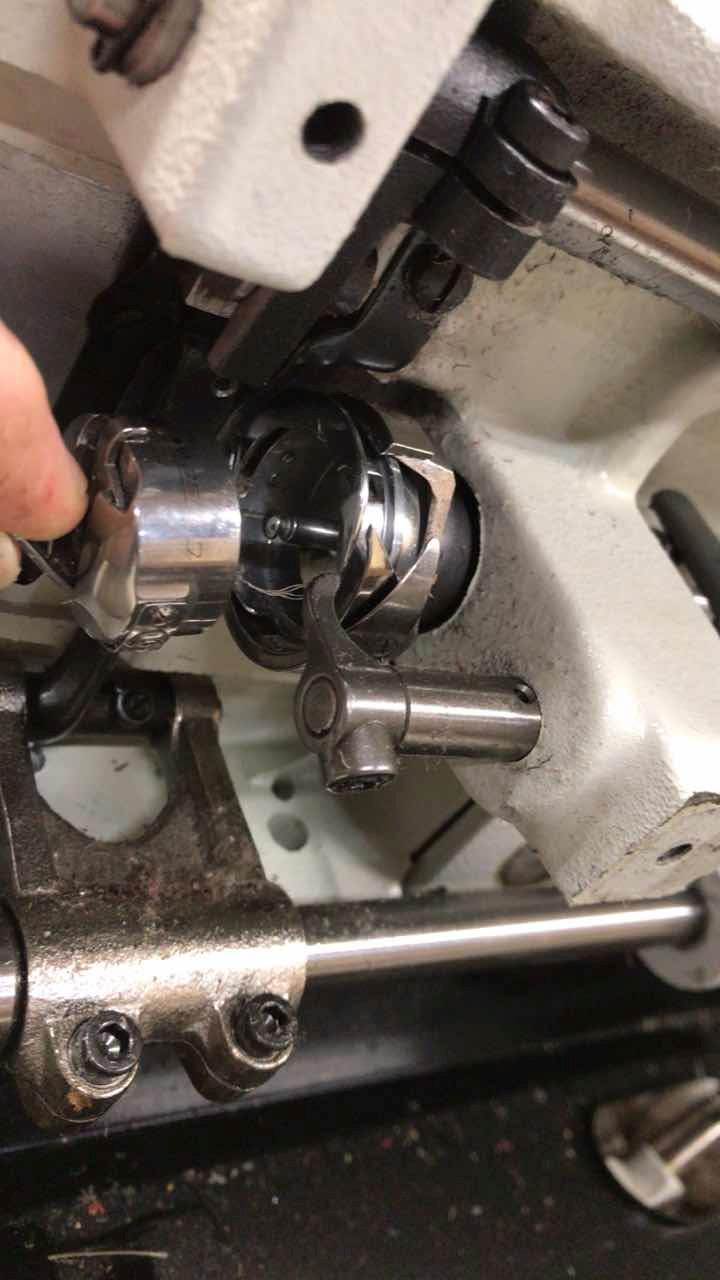
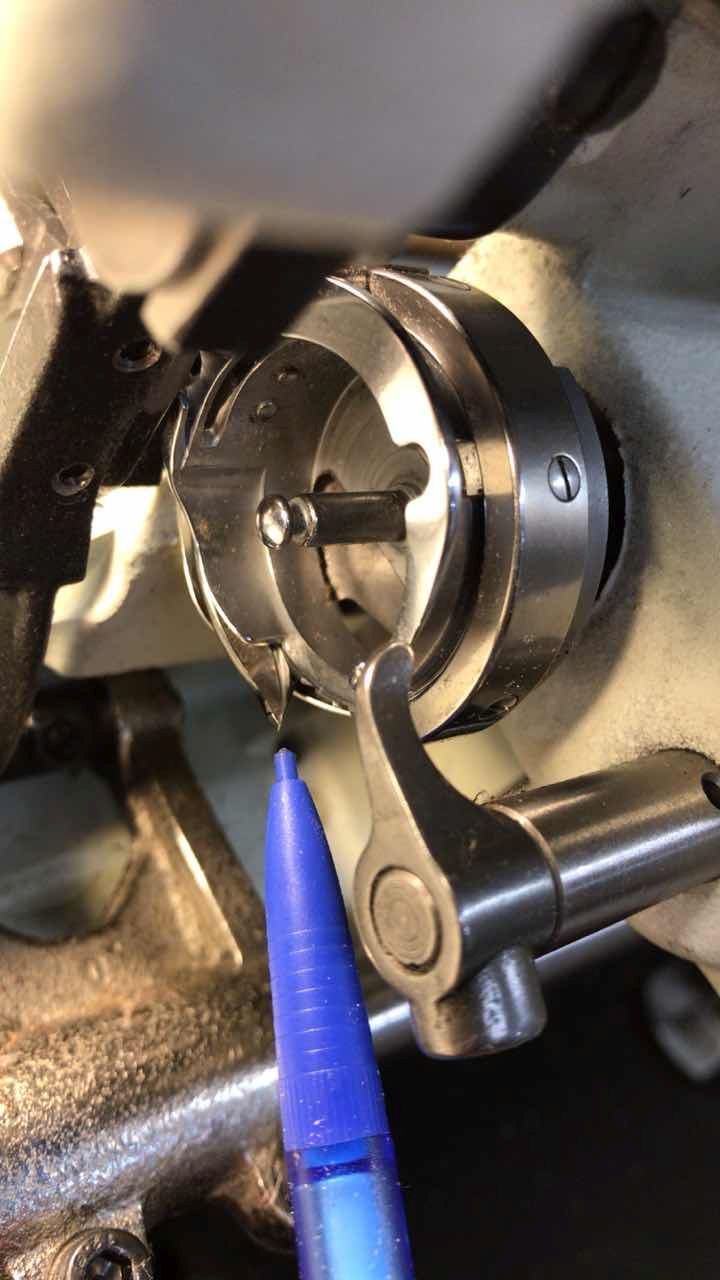
3. Release 2 screws, that secure the Rotary Hook on it's shaft, do not remove them. Release one screw, then rotate the Fly Wheel to expose and release the second screw.
4. Lower the needle to it's lowest position by rotating the Fly Wheel
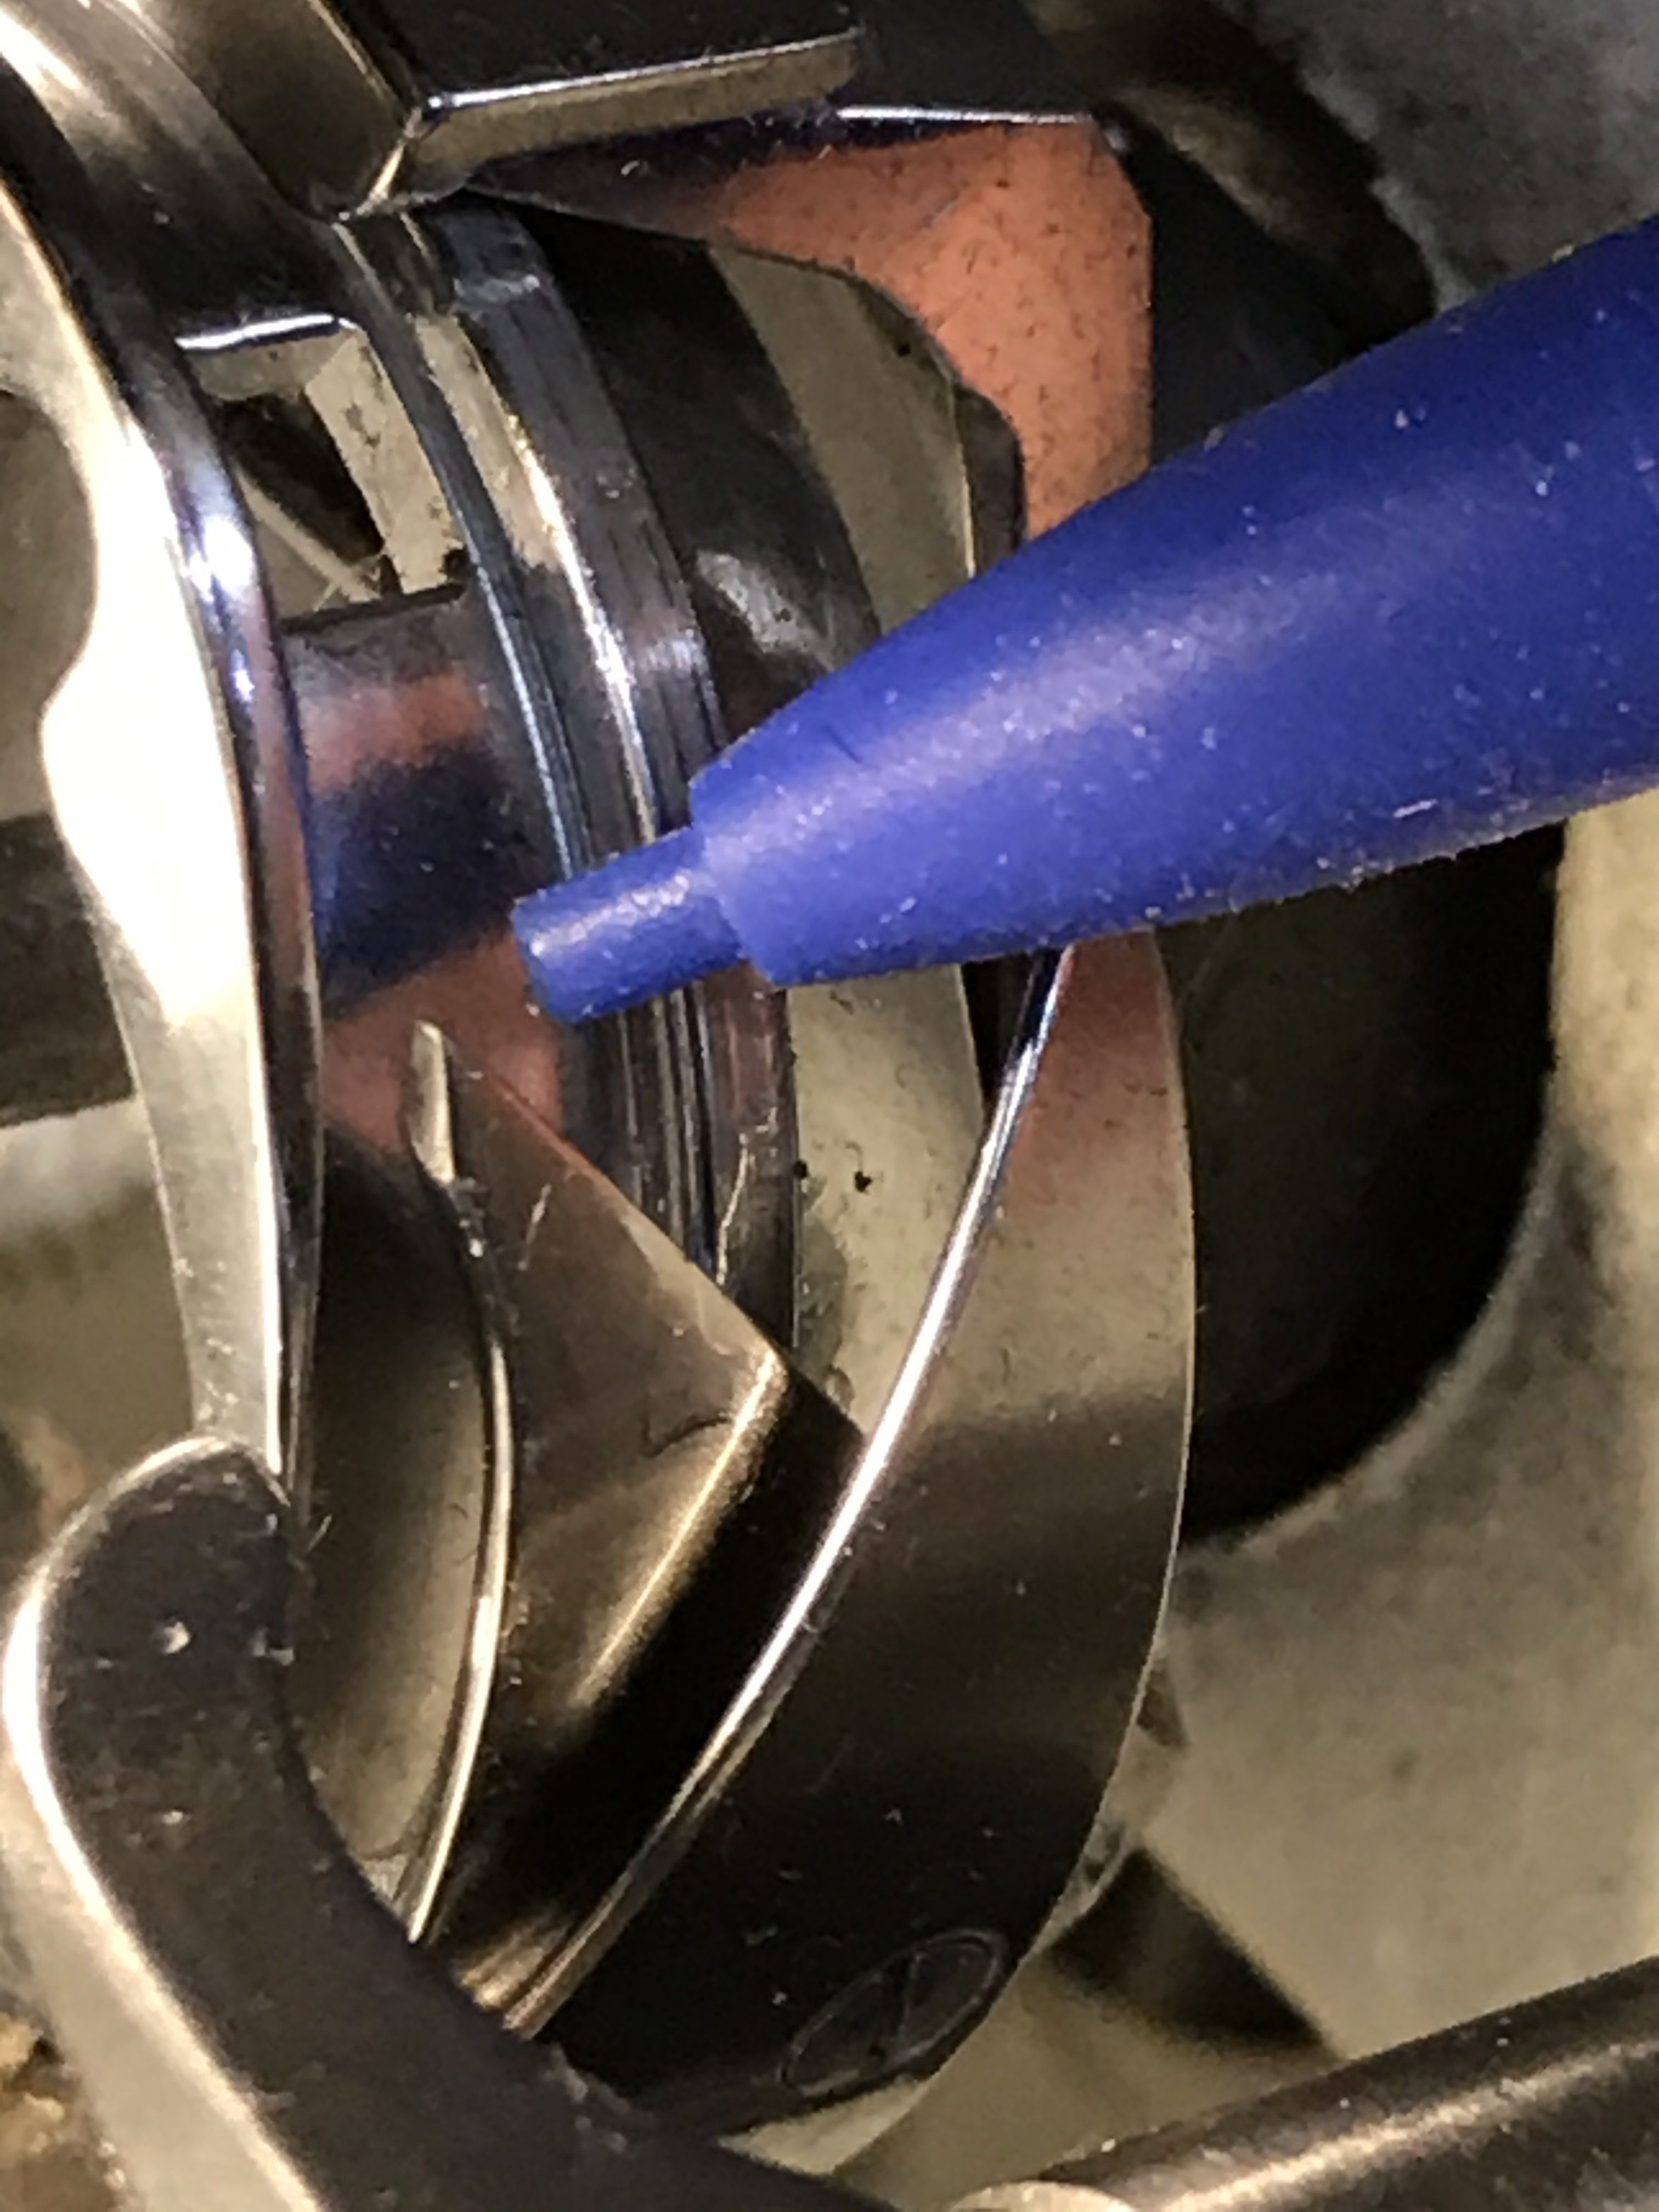
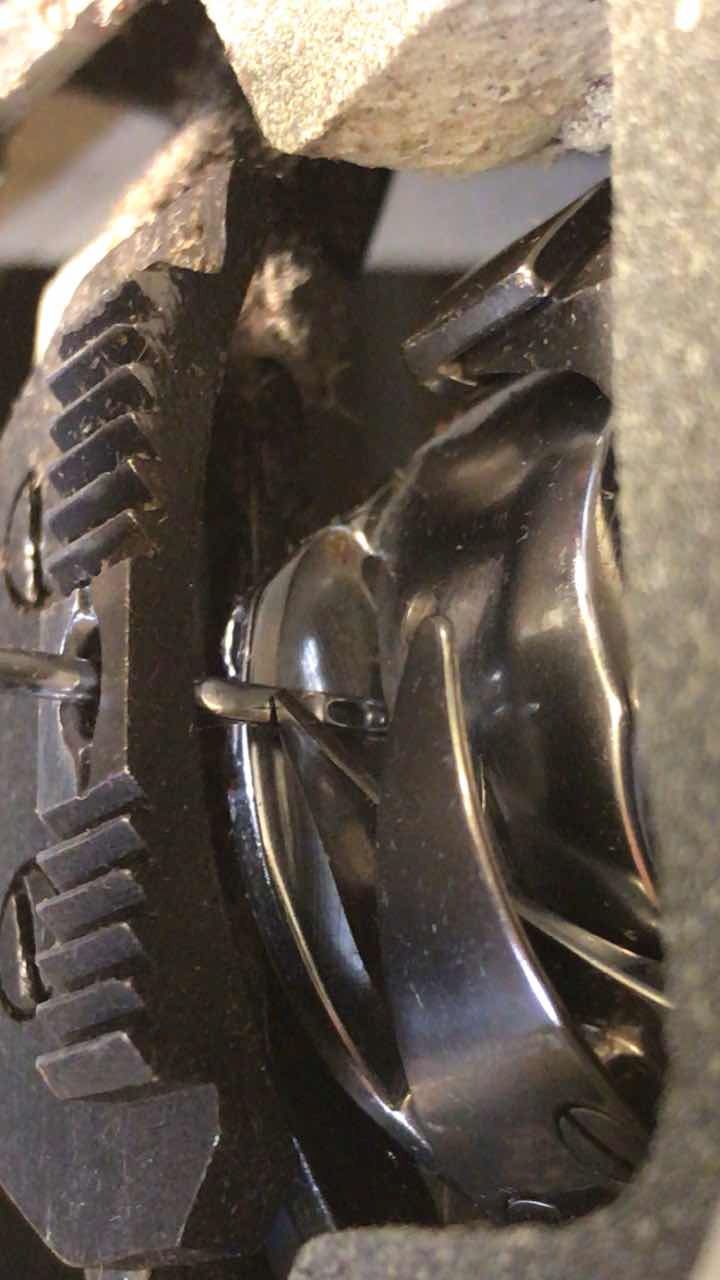
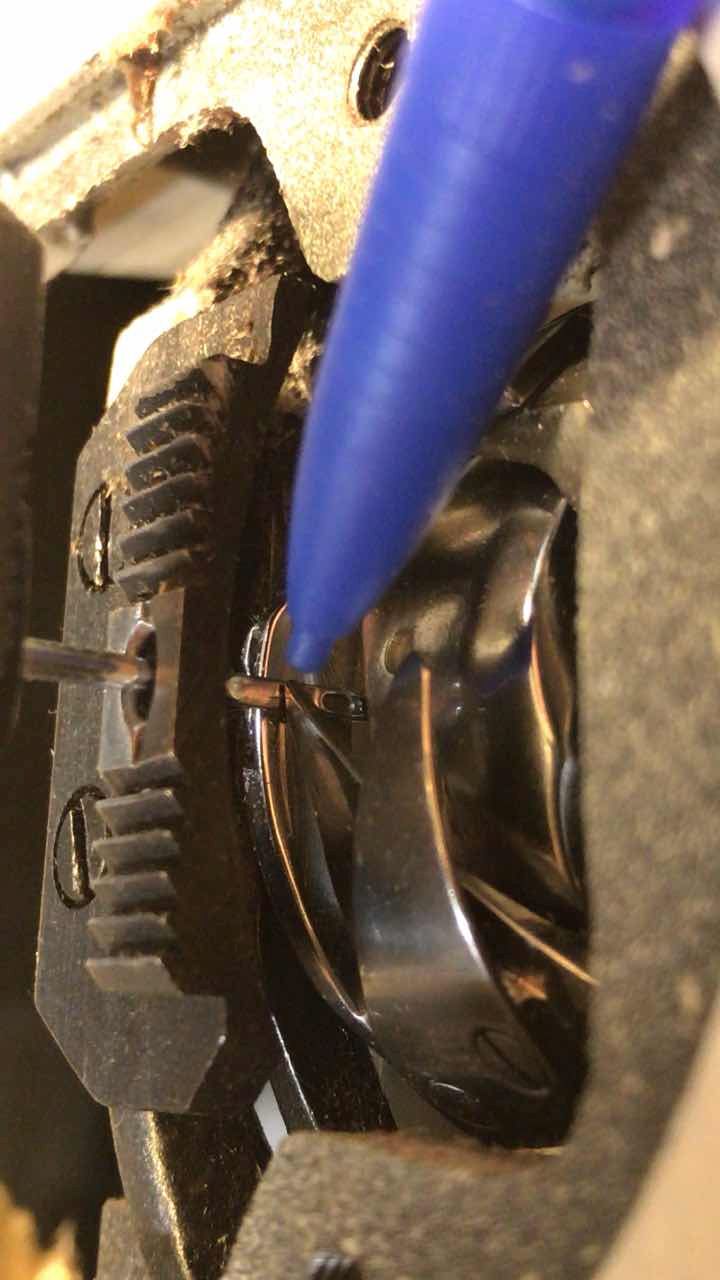
5. Rotate the Rotary Hook by hand until it's sharp point will be against the needle, touching it with it's flat sharpened part on the sharp point. While holding the Rotary hook in this position slightly rotate the Fly Wheel to slightly move the needle up, until the sharp point of the Rotary Hook will be in the middle of the needle cut out - see picture.
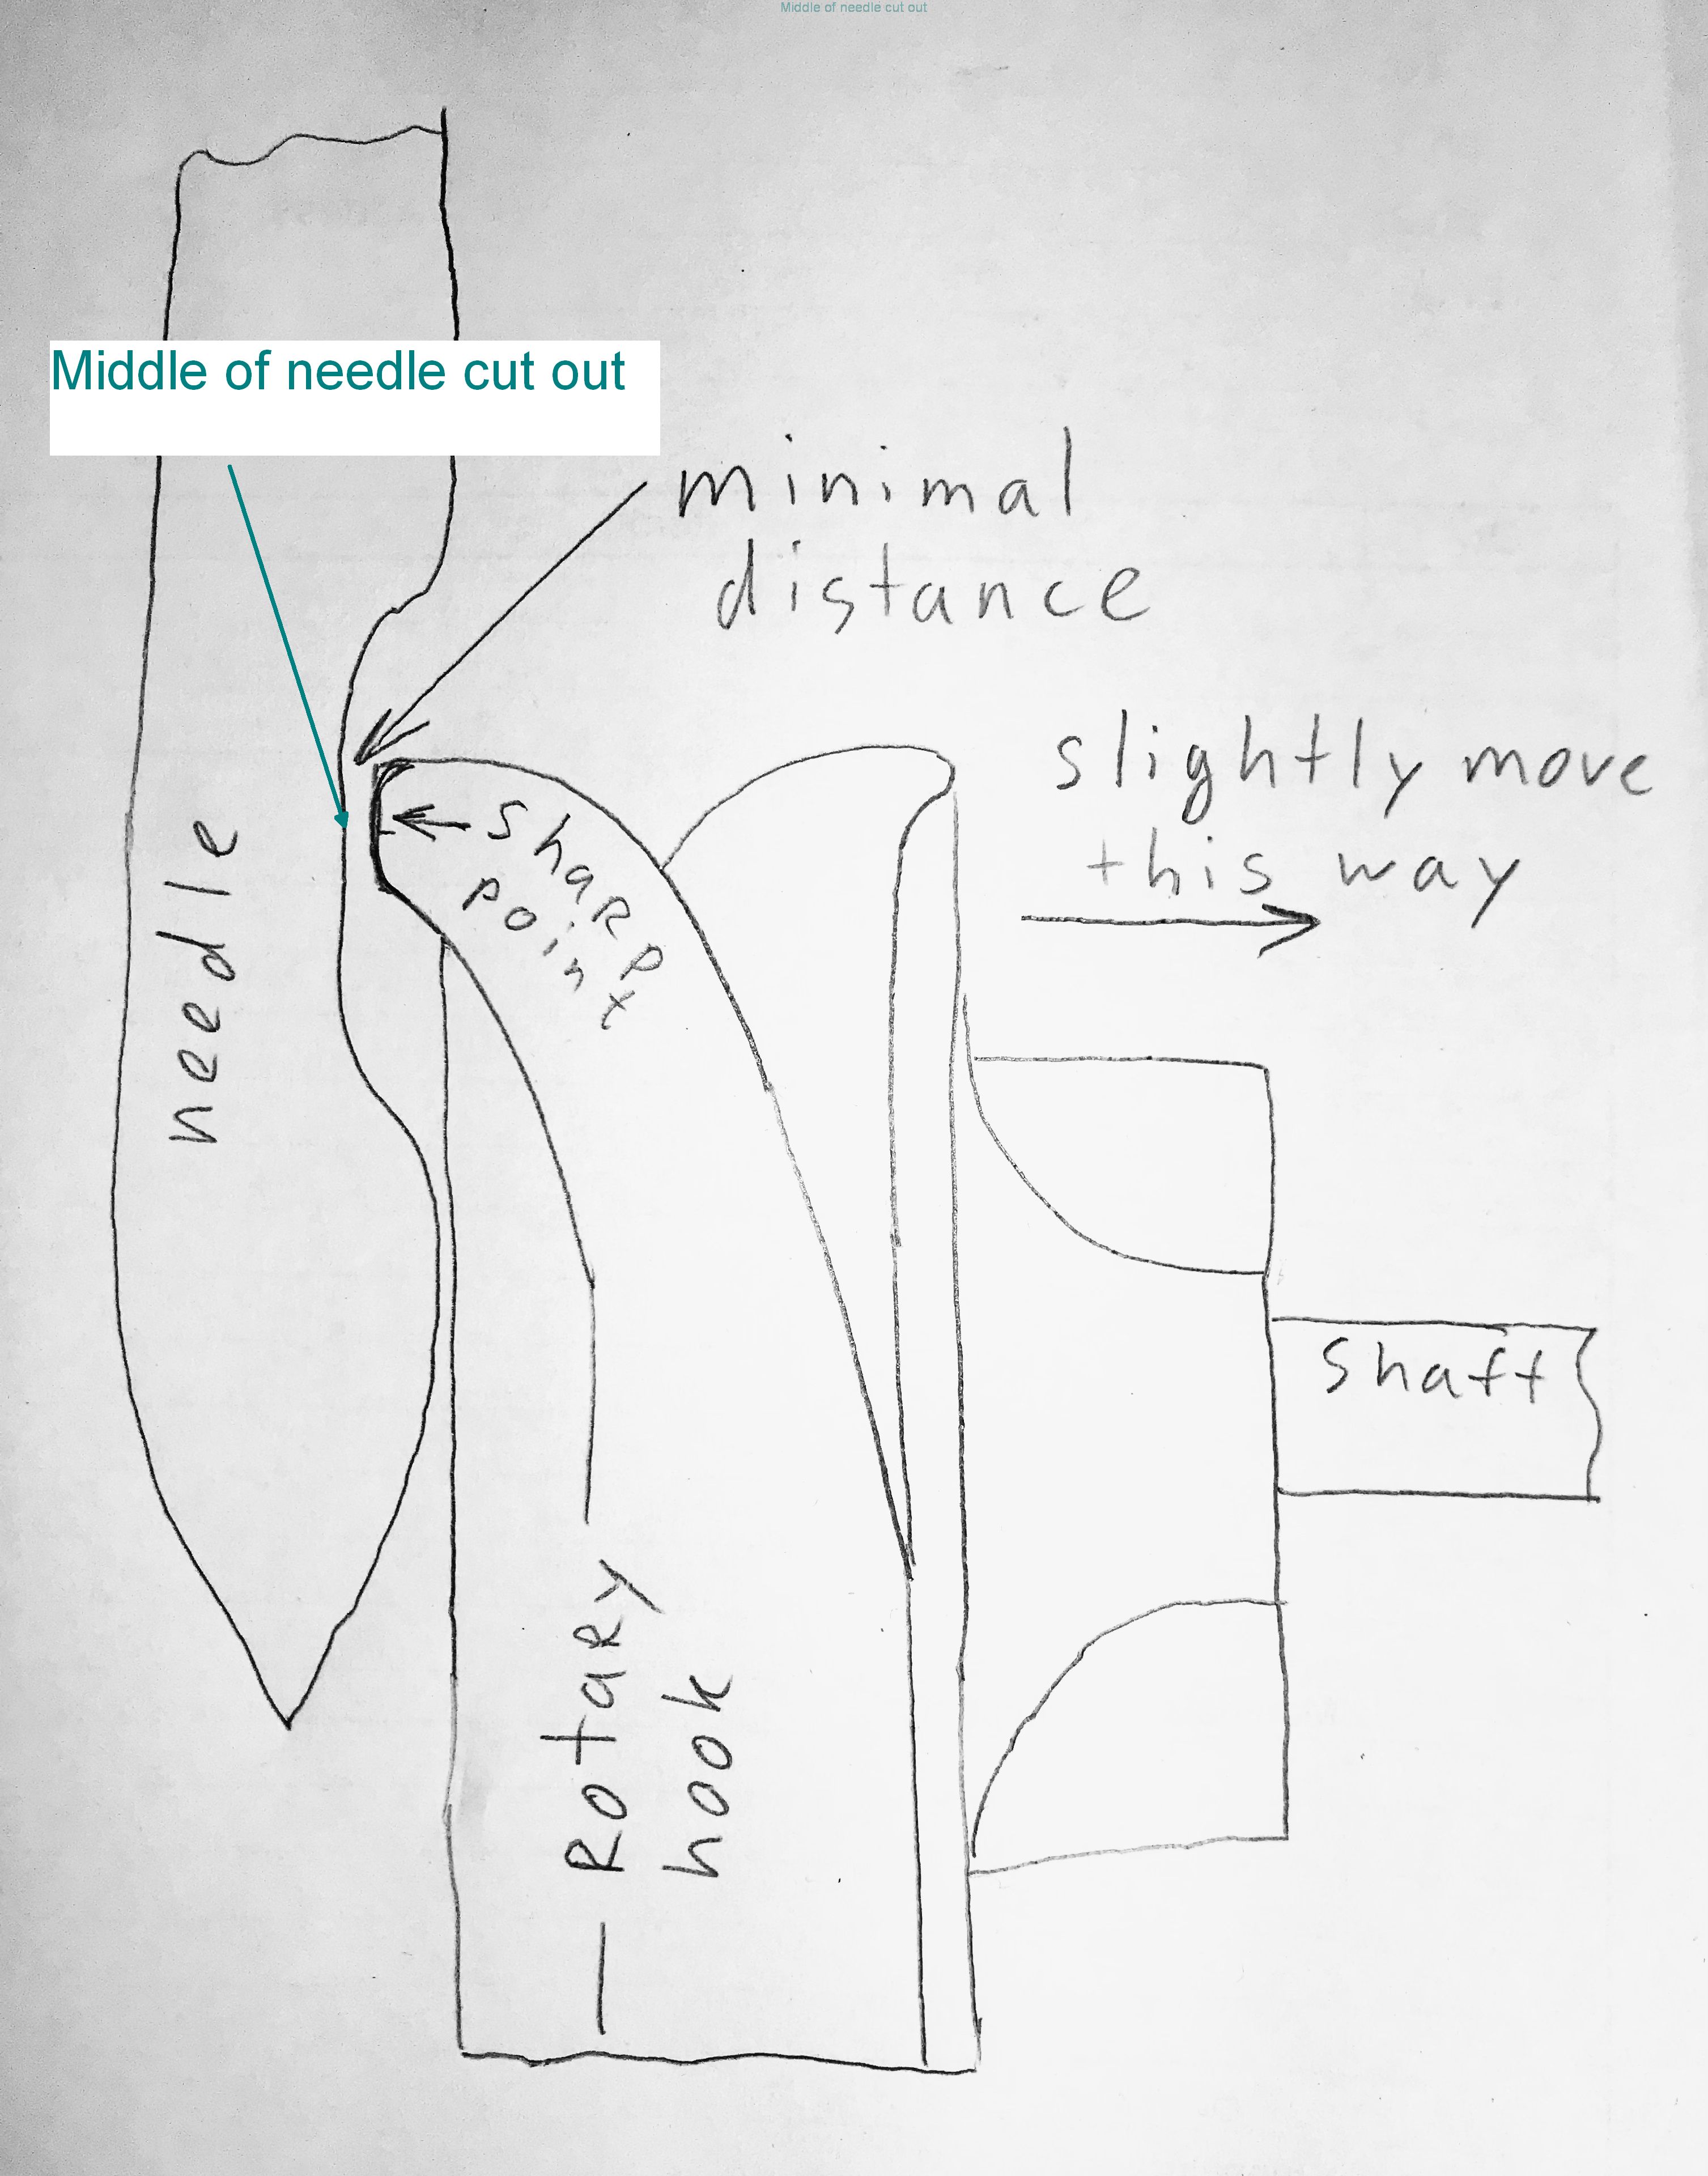
6. Holding the Rotary Hook at above position with the sharp point touching the needle slightly move the Rotary Hook away from the needle along it's shaft, to create a minimal distance between the needle and the Rotary hook - Do Not rotate the hook on it's shaft while doing it.
7. While carefully holding the Rotary hook in this position tighten back it's screws, that secure it on it's shaft, the ones, that were released at the beginning of this alignment. Tighten one screw first, let go your hand of the Rotary Hook and then rotate the Fly Wheel to expose and tighten the second screw.
8. The alignment is complete. Tilt back the machine head and install back the 2 cover plates that were removed at the beginning of alignment.
_______________________________________
Consew 206RB-5 Assembly Guide
Back To The Top
The assembly of Consew 206RB-5 is like the assembly of many other industrial sewing machines - for most part it is assembly of the table with the machine head placed on the top of the table. The table that comes with Consew 206RB-5 is a standard industrial sewing machine table, that is supplied with many other sewing machines. It's frame assembly is simple and straight forward. The most involved part of the assembly is attaching to the table top parts that require to be properly aligned with the machine head to function properly. Our guide with pictures will show how to put it together correctly.
(Click on the images to see a larger picture)
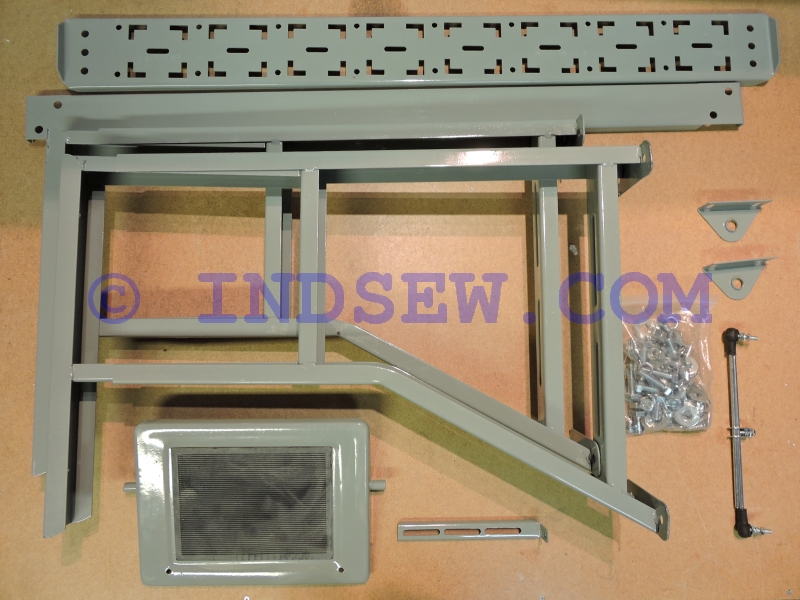
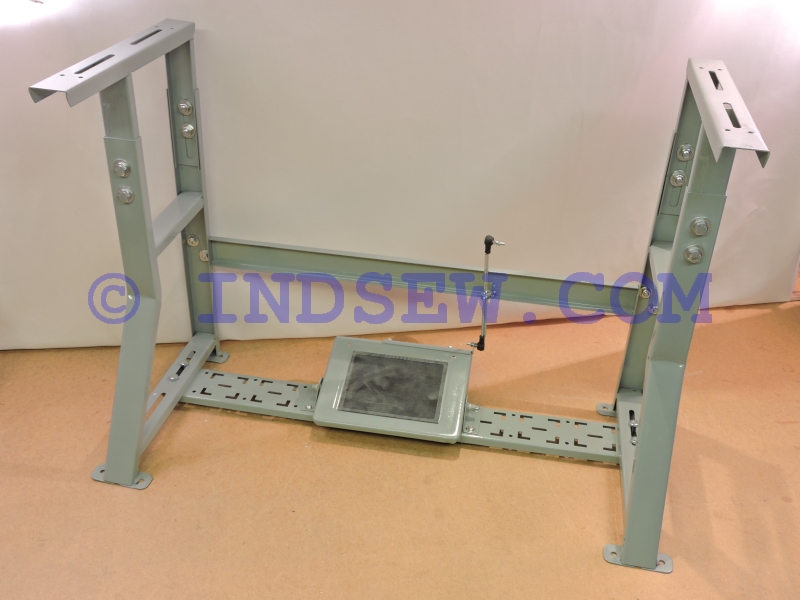
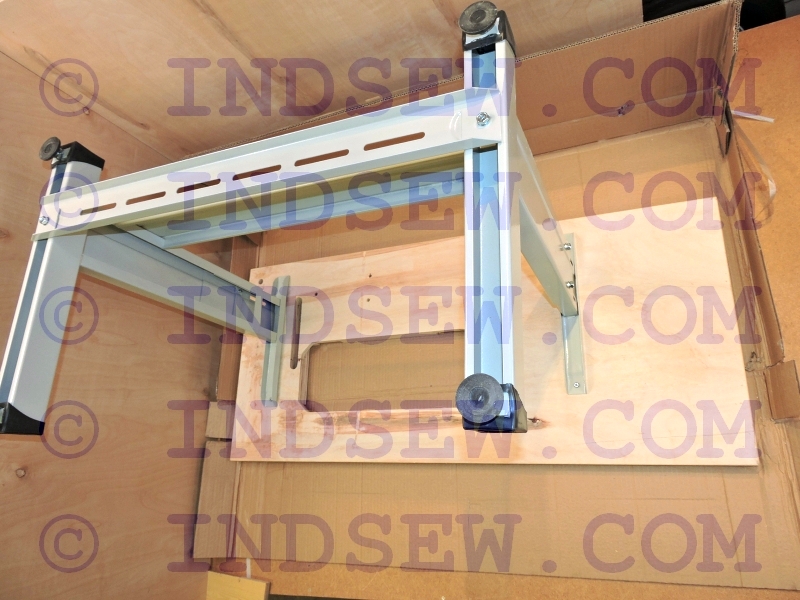
1. Assemble table frame.
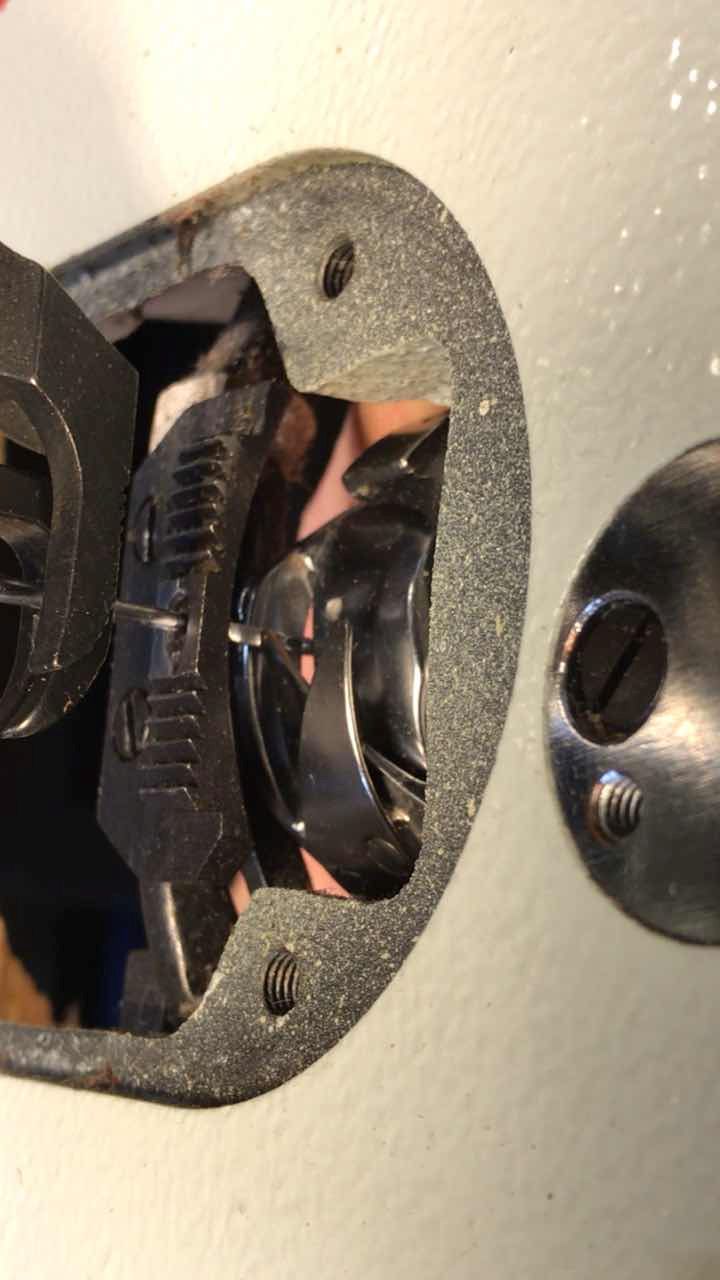
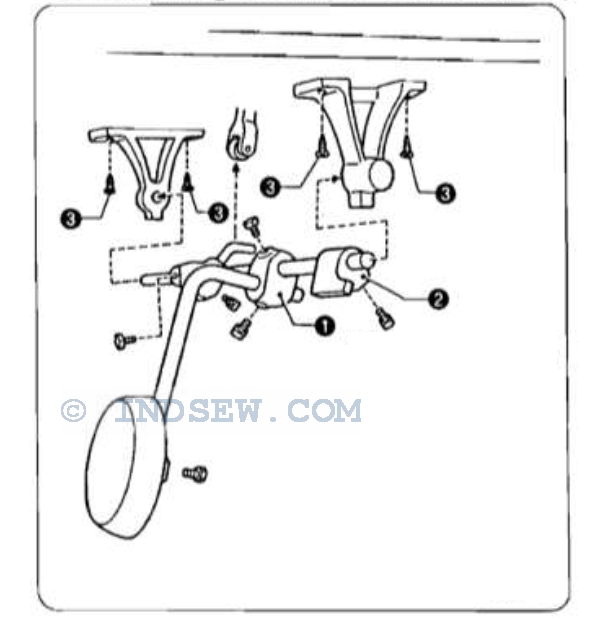
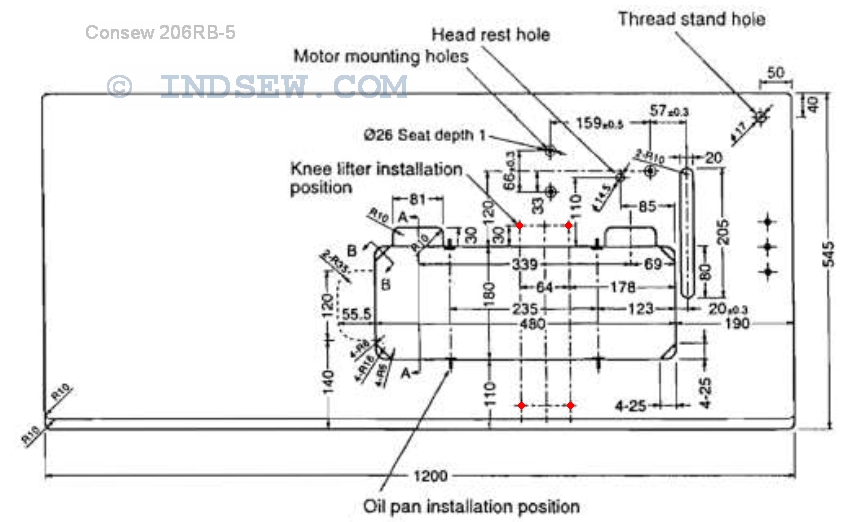
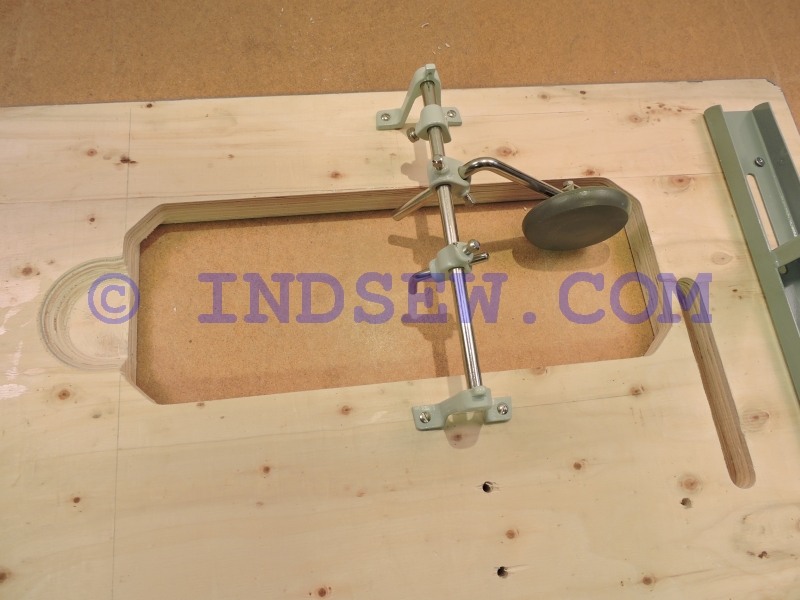
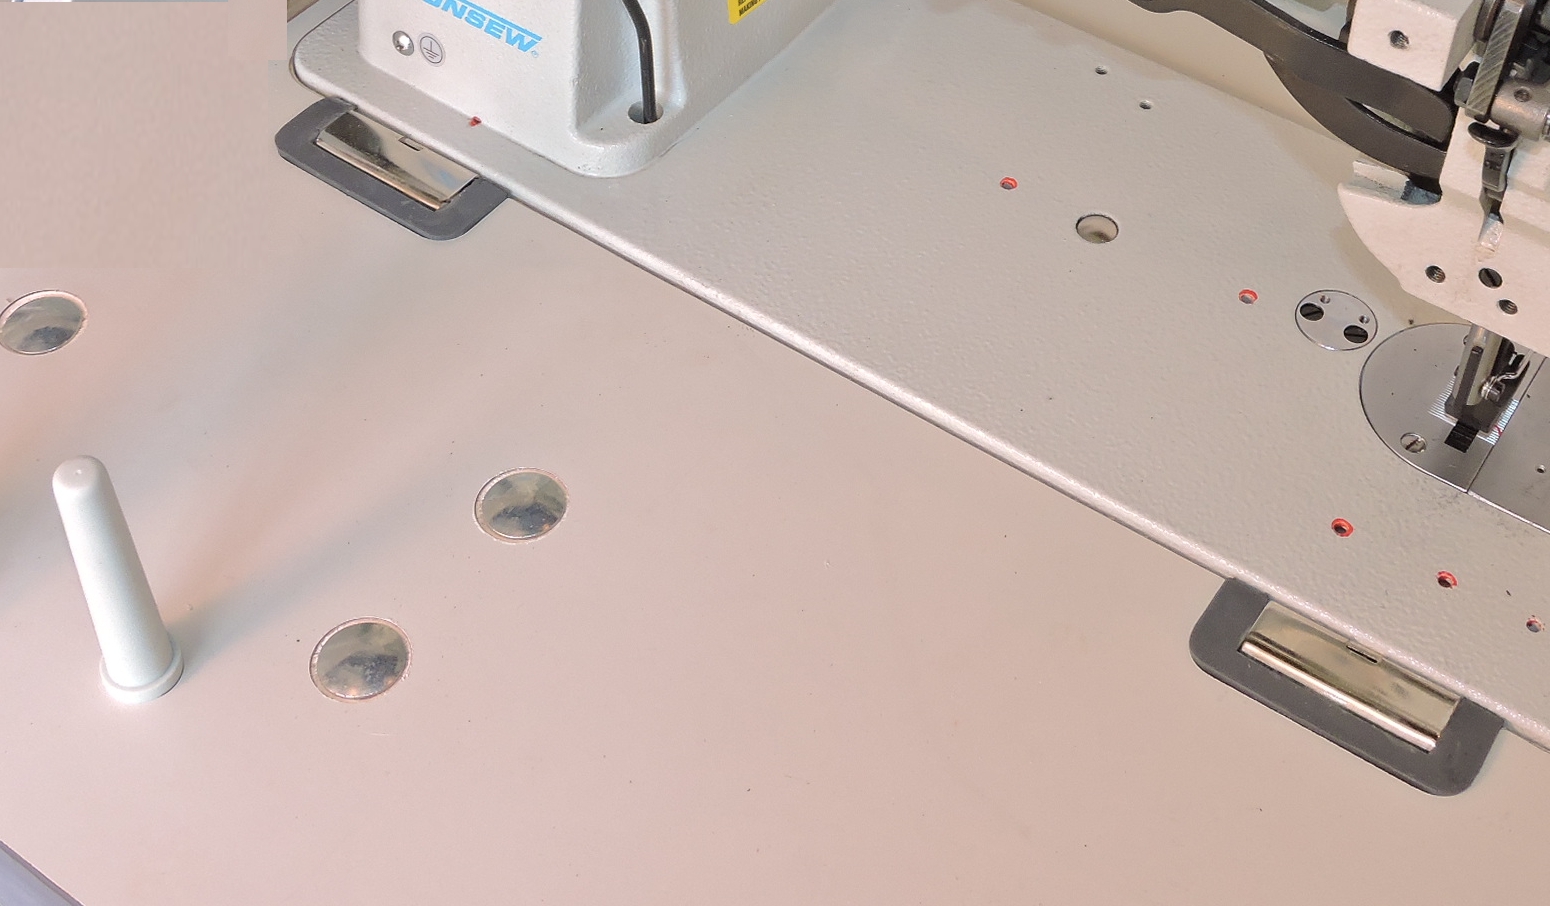
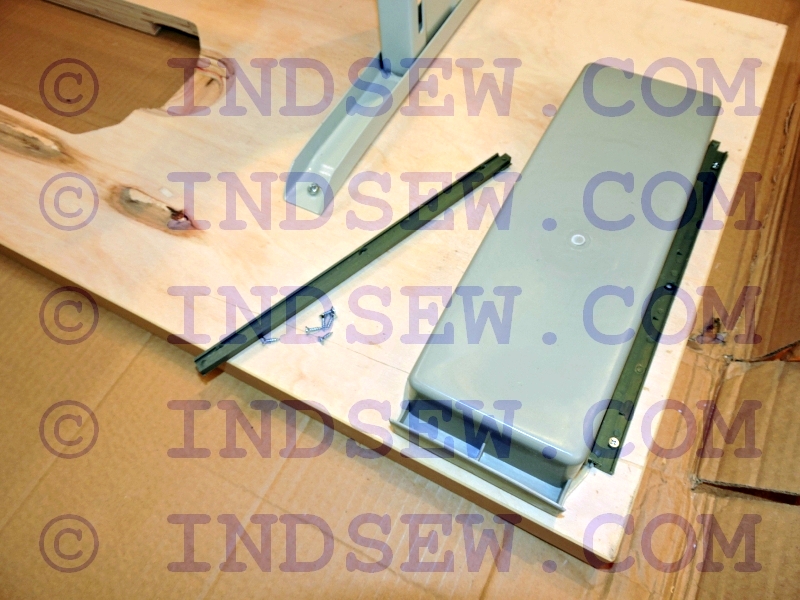
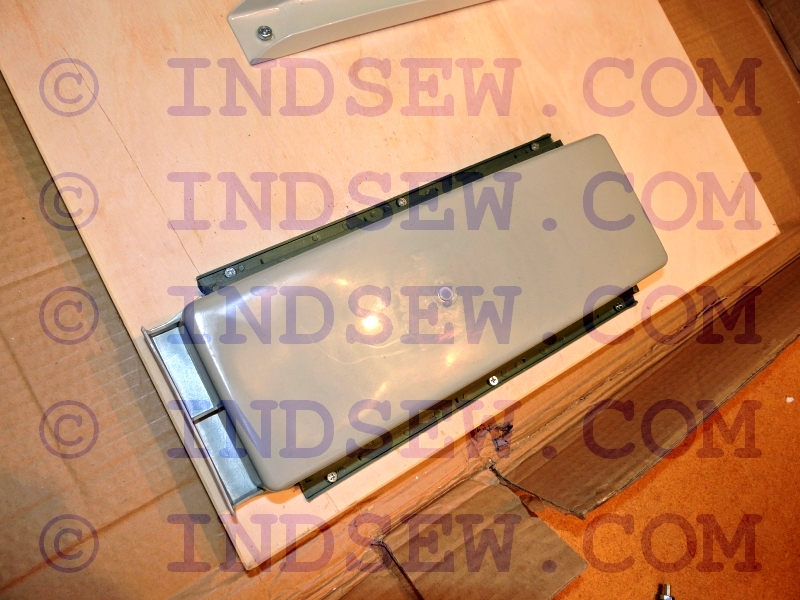
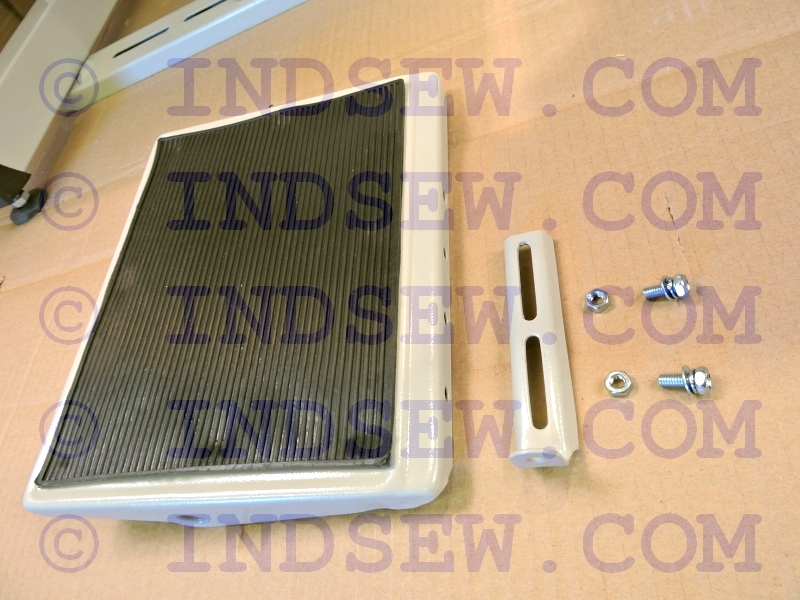
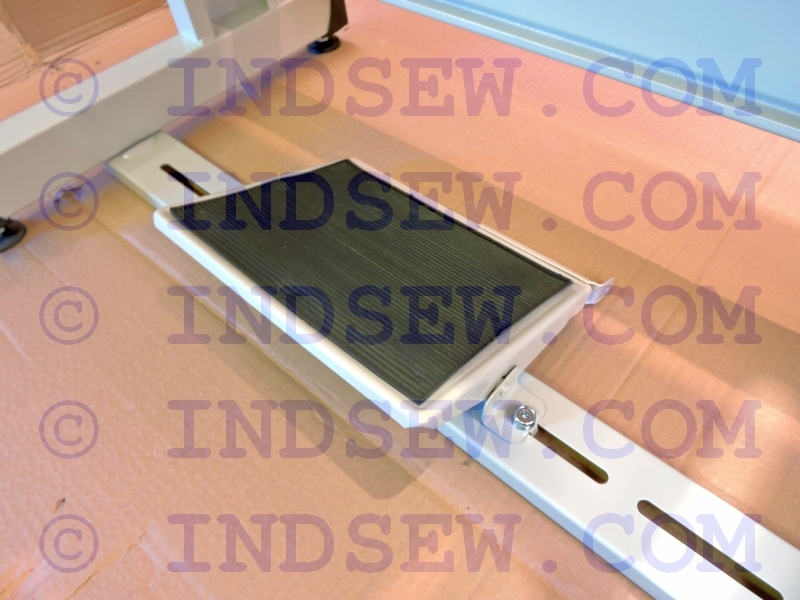
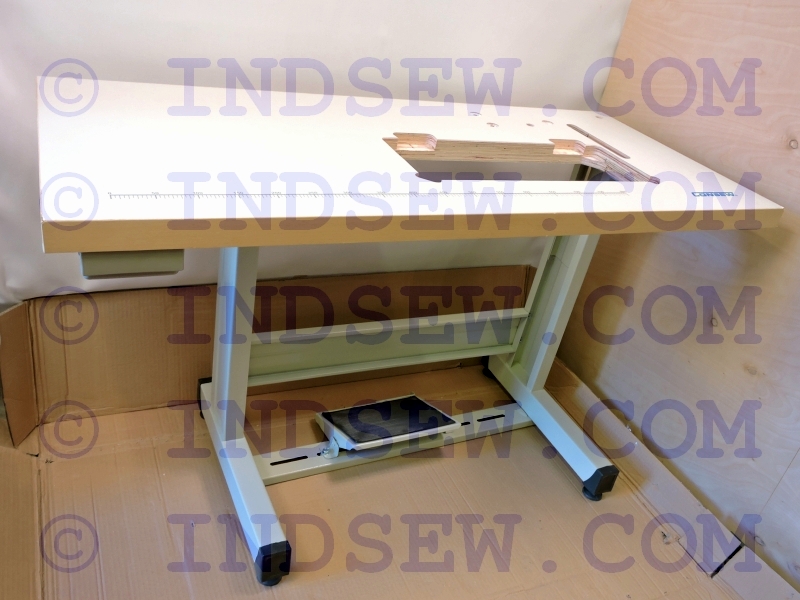
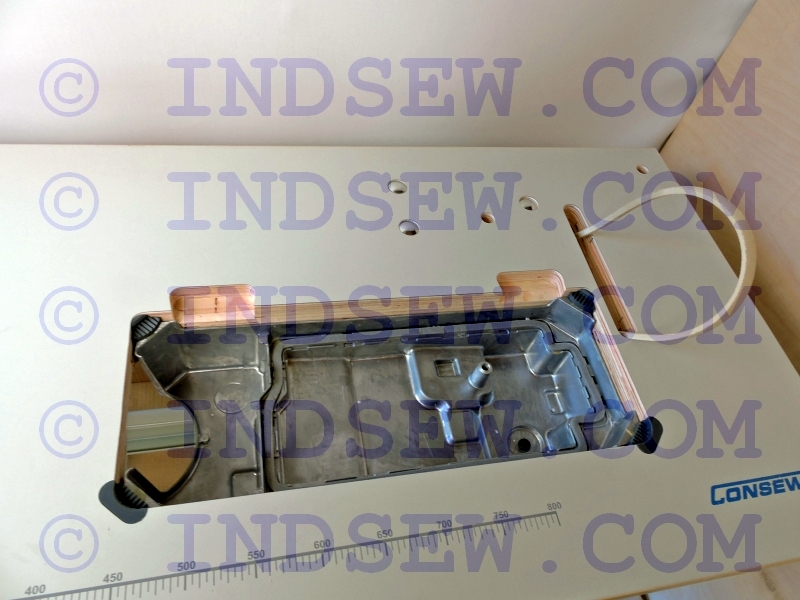
2. Assemble foot lifter as shown on drawing. Install foot lifter with 4 screws to the bottom of the table - see picture with measurements for positioning the screws - shown with red dots. Attach table top to the table frame, use nails to nail the black bottom pad to the table top, make sure the lifter part of the knee lifter spins freely in the pad opening. (Machine head is not installed on the table at this point yet, picture shown with the head installed)
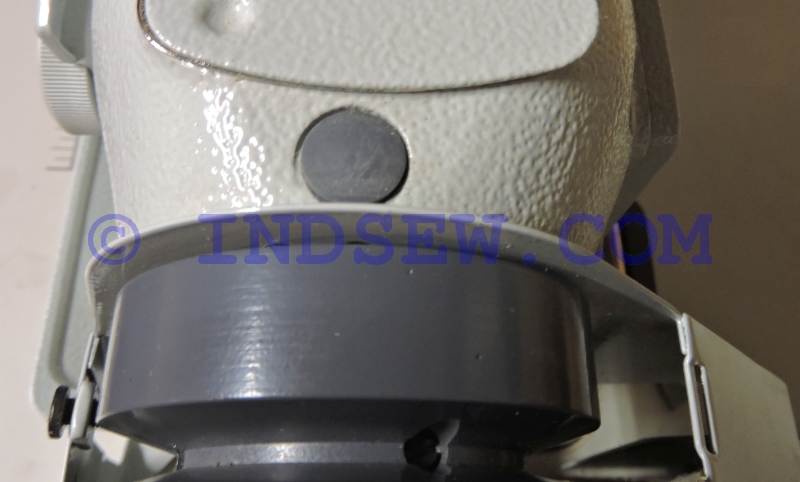
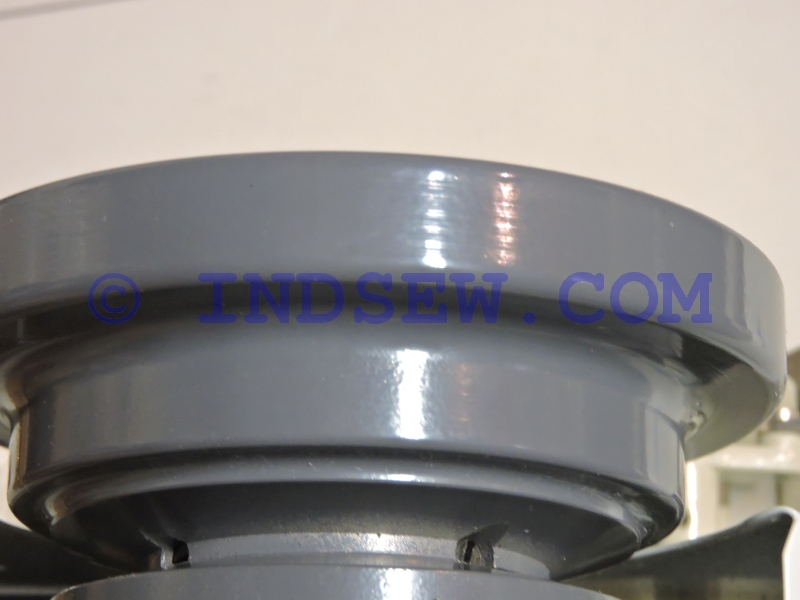
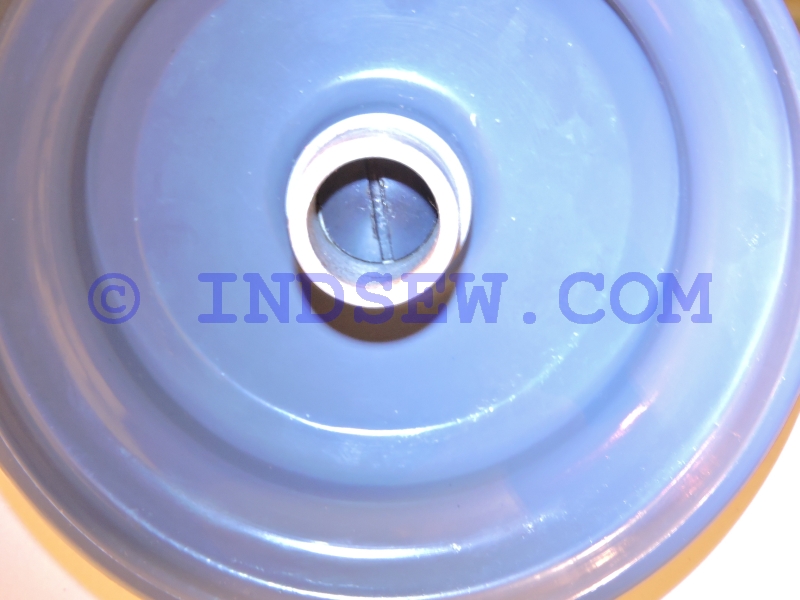
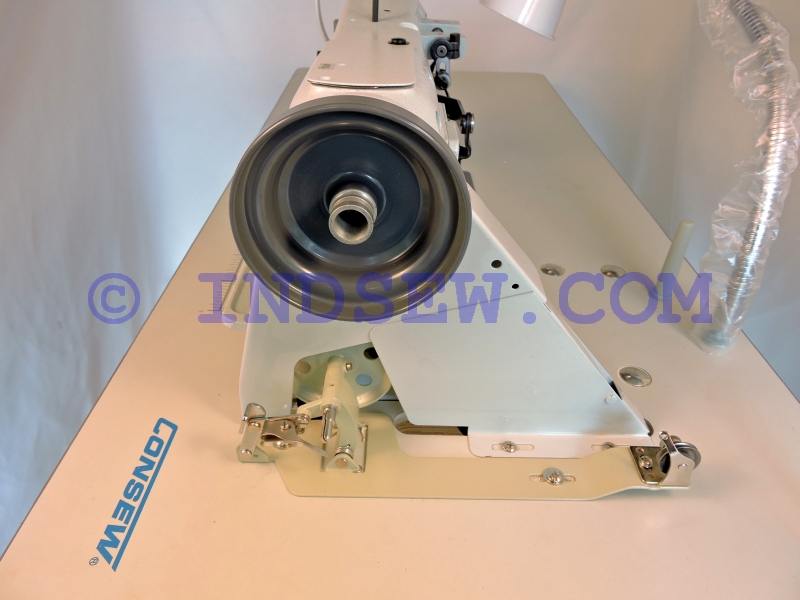
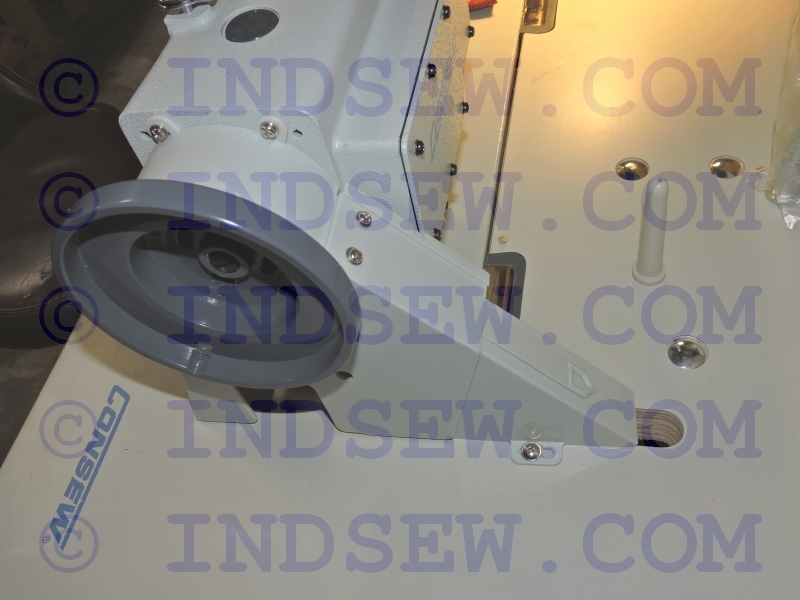
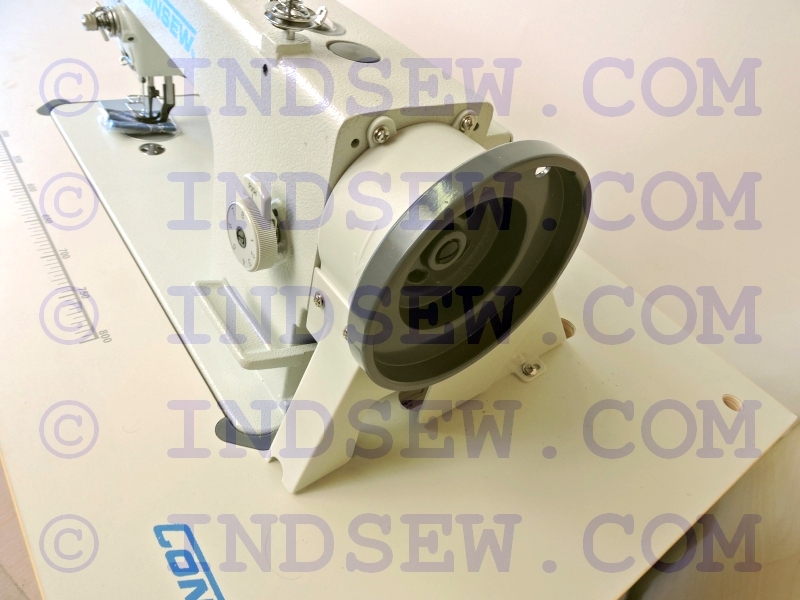
3. Unpack machine head, BEFORE ATTACHING THE BELT PULLEY - attach part of the belt cover to the head of the machine, then attach belt pulley to the machine head with 2 small headless screws, making sure they align with corresponding cuts on the shaft and 1 big screw to the center of the pulley.
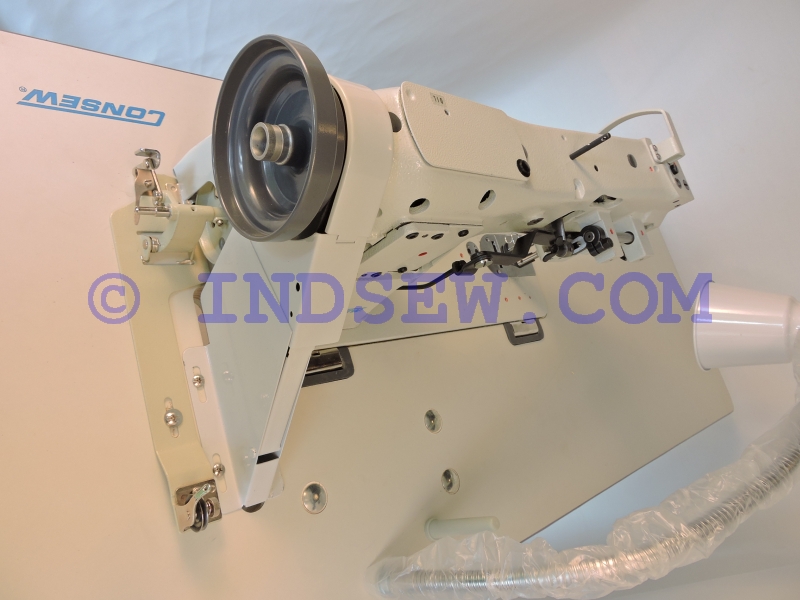
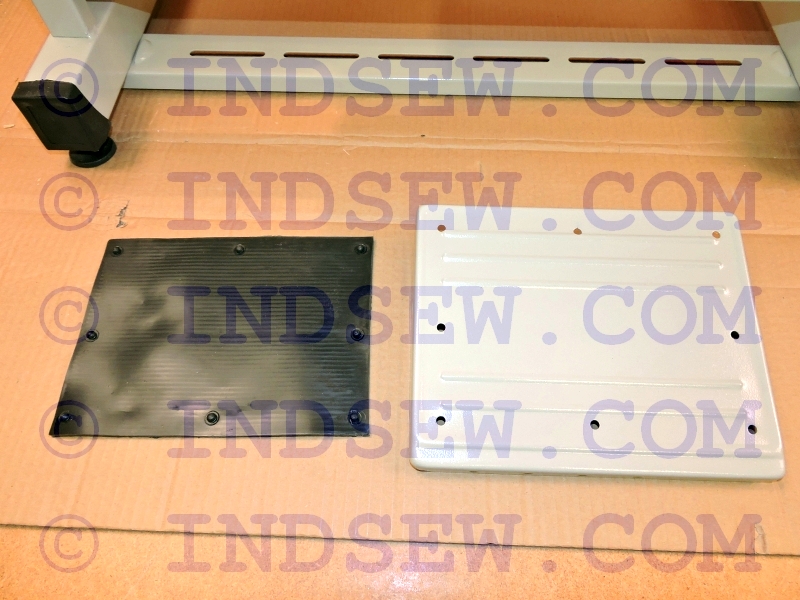
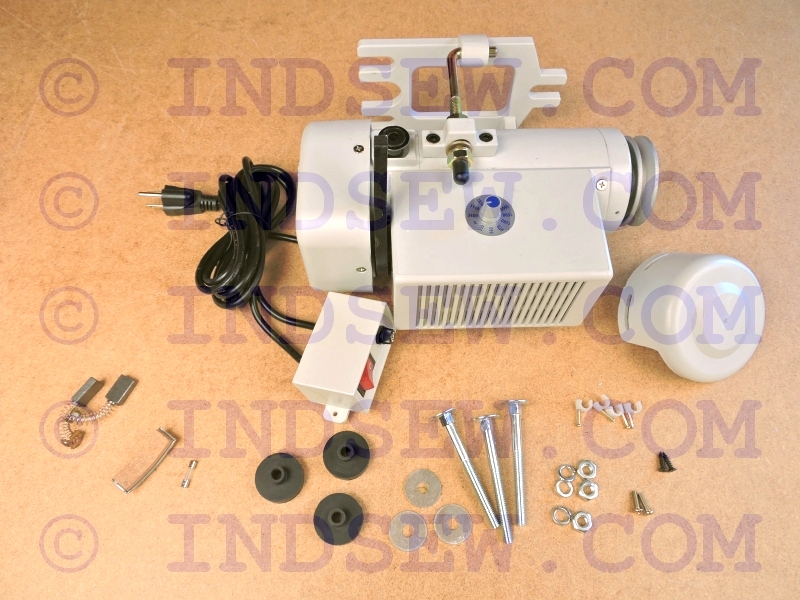
4. Place rubber pads into precut holes in the corners of the table opening and nail them. Place 2 rubber pads for machine holders in precutted holes. Place metal machine holders with pins into holes on the back of the machine and place machine onto the table, lining up the metal holders with corresponding rubber pads. Place machine head support into the predrilled whole on the table top behind the machine head, machine head rests on it when open.
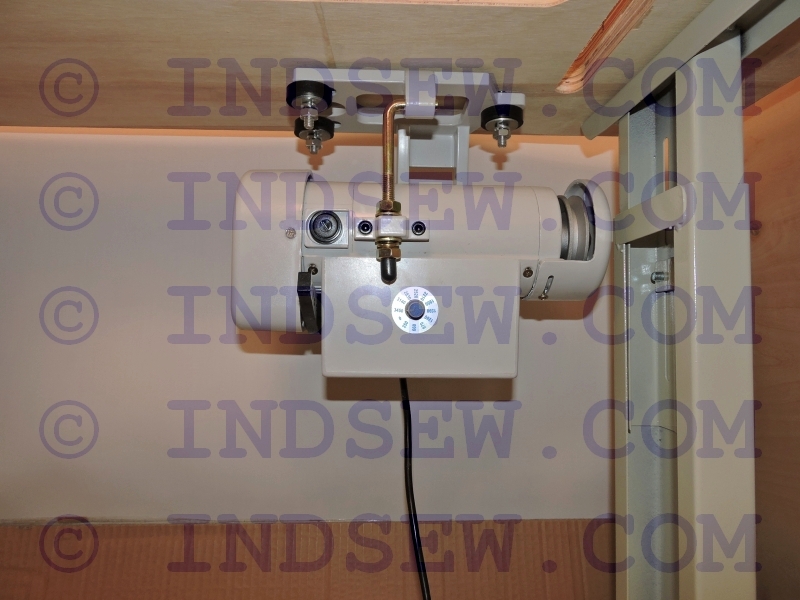
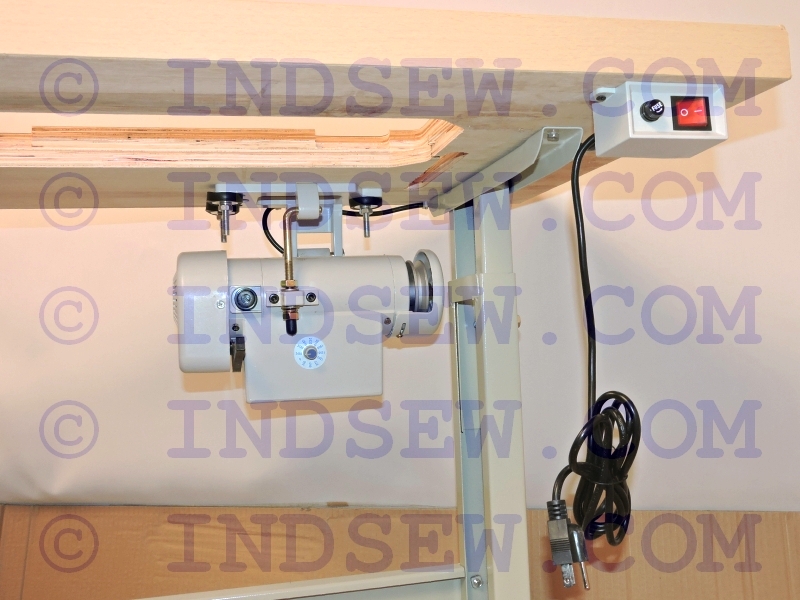
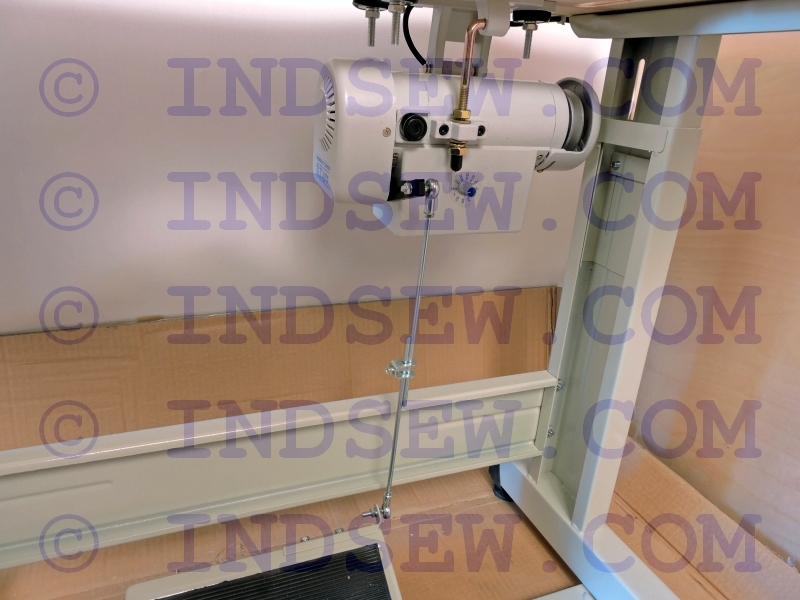
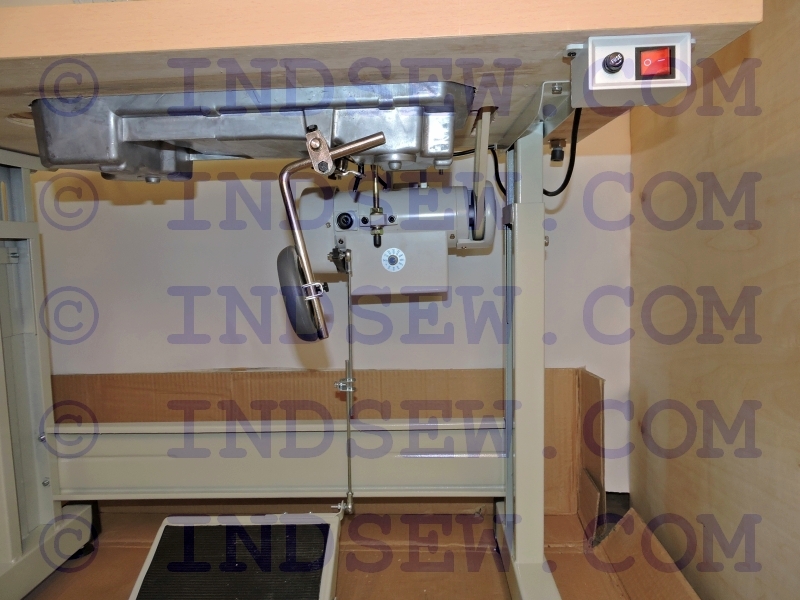
5. Install motor with 3 long bolts, connect table pedal and the motor with connecting adjustable rod. Connect machine head with the motor with the belt. Install belt cover on the motor. Adjust tention of the belt, by tightening or releasng the big ajusting nut on the motor.
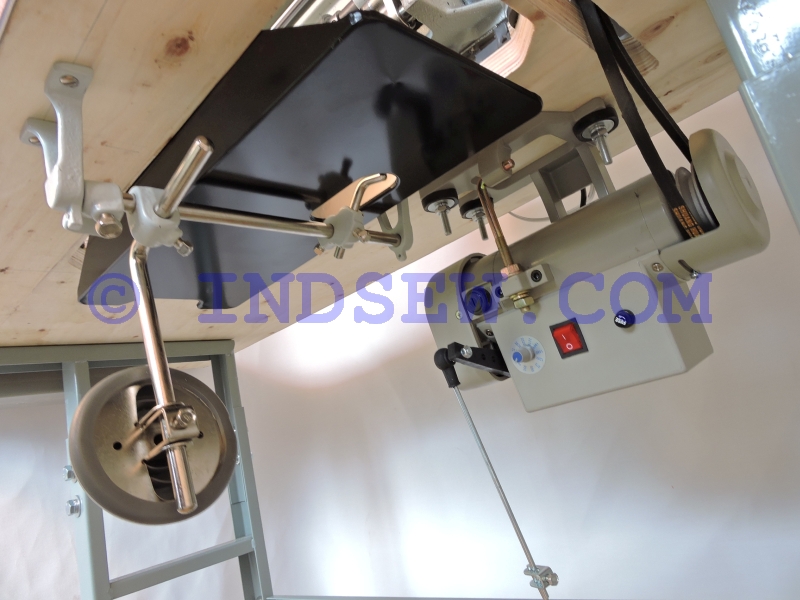
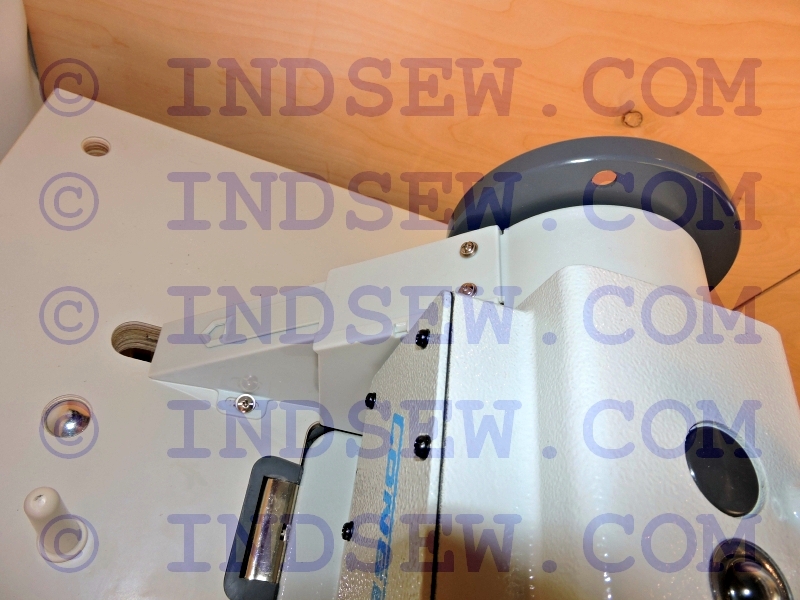
6. Install remaining pieces of machine head belt cover, rear piece needs to be screwed on to the table with 2 screws. Instal bobbin winder with screws to the table top making sure the bobbin winding wheel is connecting with the belt in pressed on position.
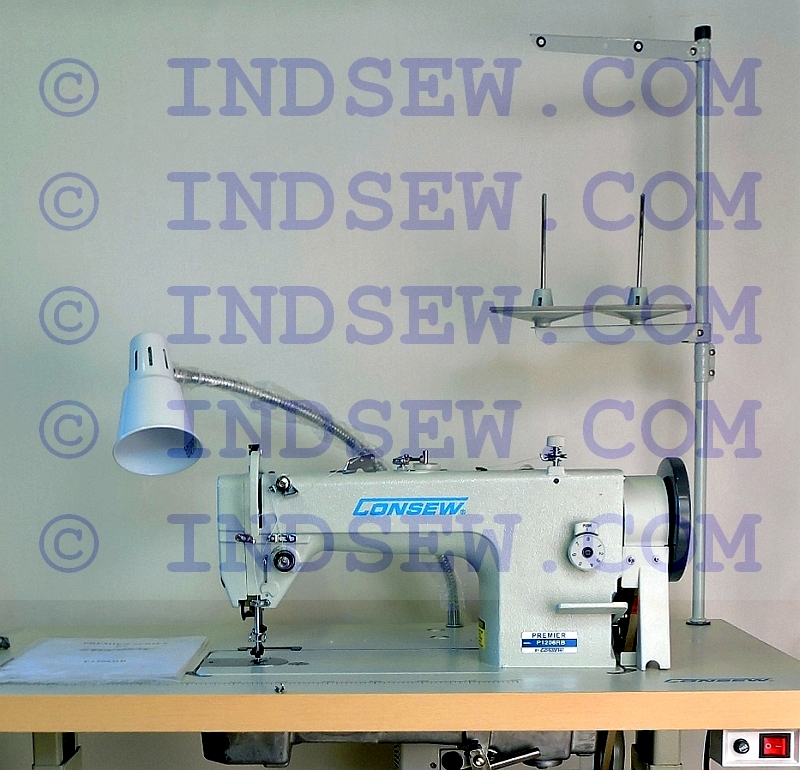
8. Install lamp, assemble and install bobbin stand in predrilled holes in the table.
Installation Complete.
_______________________________________
Needle Sizes, Thread Sizes
Back To The Top
Threads and needles come in variety of sizes. It is important to use correct size of the needle for the thread you are using. The wrong size selection can cause inadequate stitching or sometimes even machine damage. Pick the right needle for your thread:
|
Thread Size (Tex):
|
45
|
70
|
90
|
135
|
210
|
270
|
350
|
410
|
600
|
|
Needle Size:
|
14-16
|
16-18
|
18-20
|
20-22
|
22-24
|
24-26
|
26-28
|
28-30
|
30-32
|
Keep in mind some machines are not capable of using needles thicker than certain size, or may need adjustments.
_______________________________________
Needle Points and Stitch Types
Back To The Top
To achieve the correct style of stitching for leather use the right type of needles. Leather needles come in several variations. See the guide from needle manufacturer Groz-Beckert - How to pick needles with the right needle points for sewing leather: Needle Points Guide

_______________________________________
Consew P1206RB Assembly Guide
Back To The Top
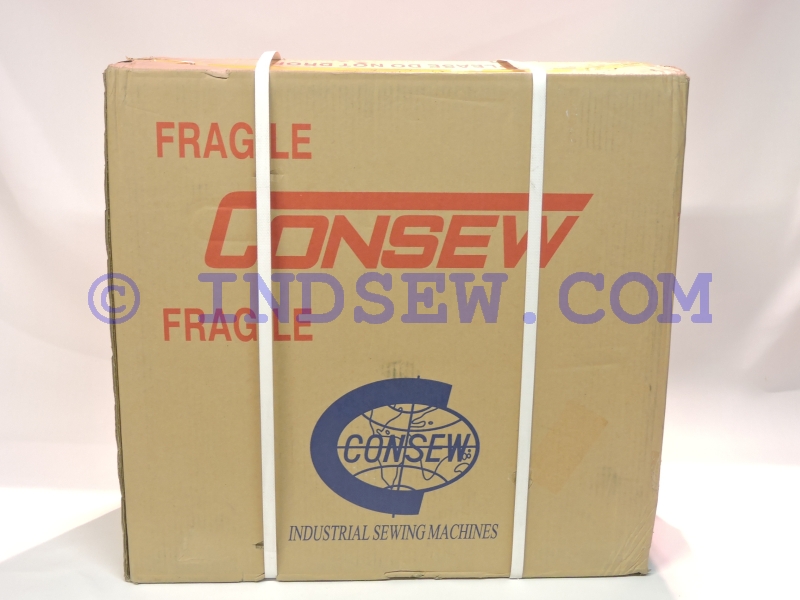
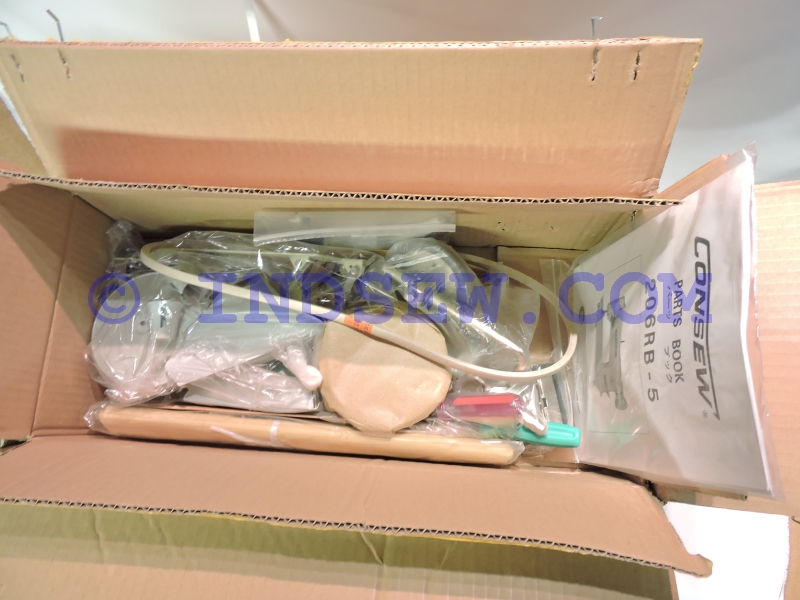
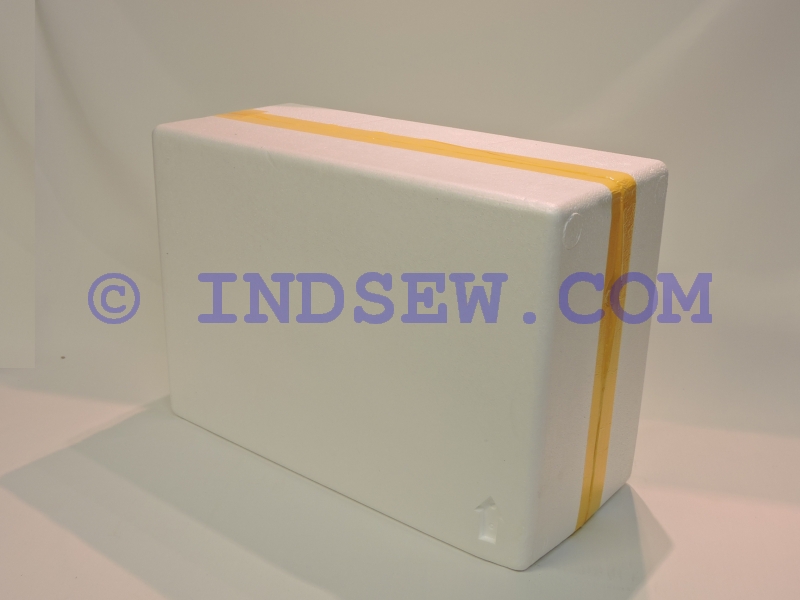
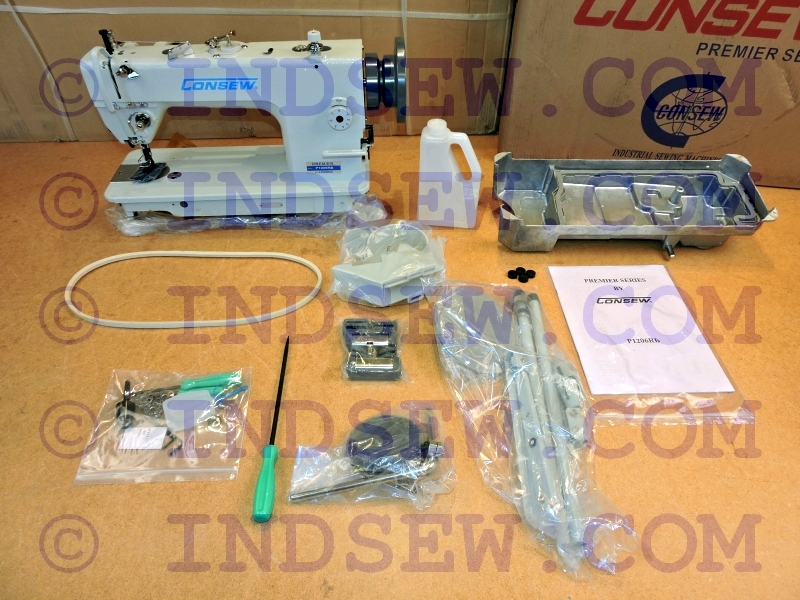
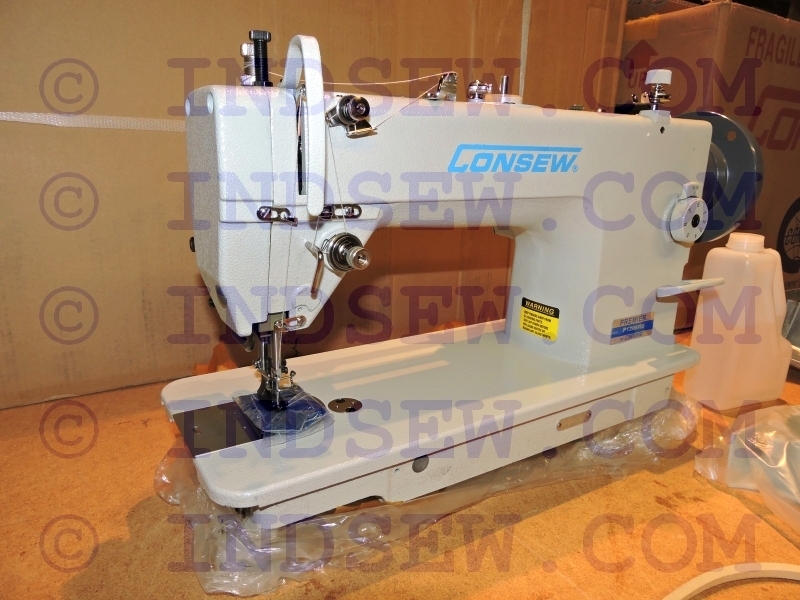
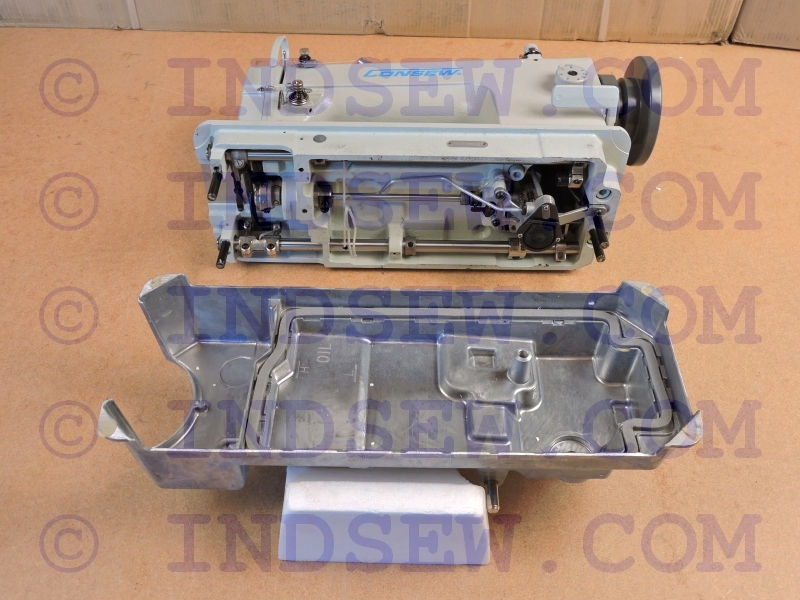
When you open your boxes this is what you can expect to find inside when you buy your machine from IndSewHawaii.com:
(Click on the images to see a larger picture)

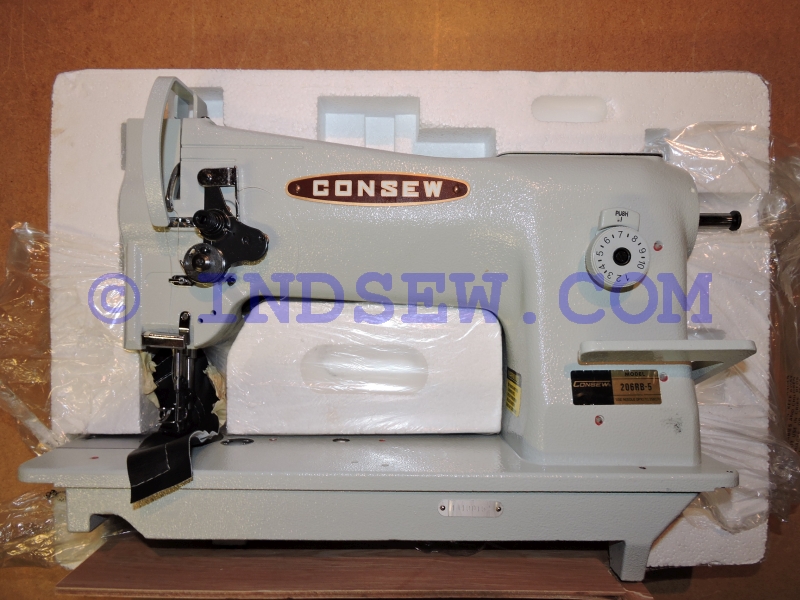
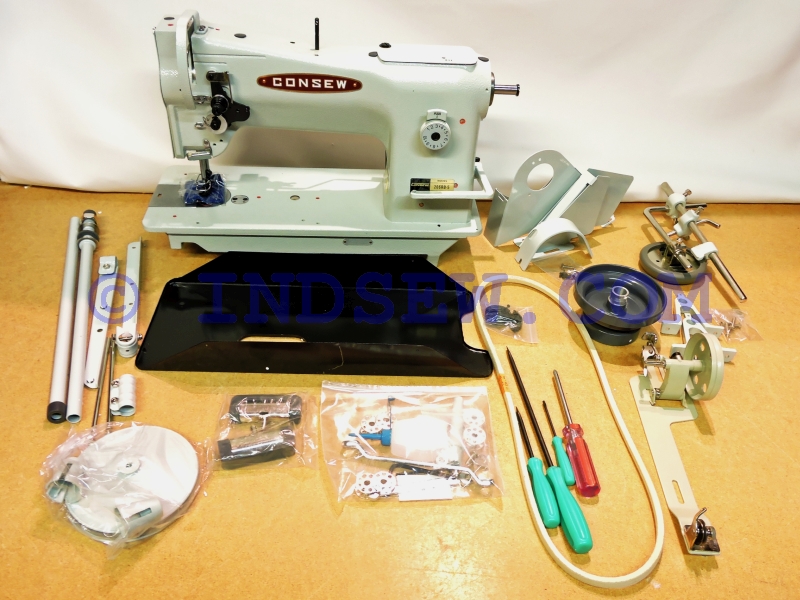
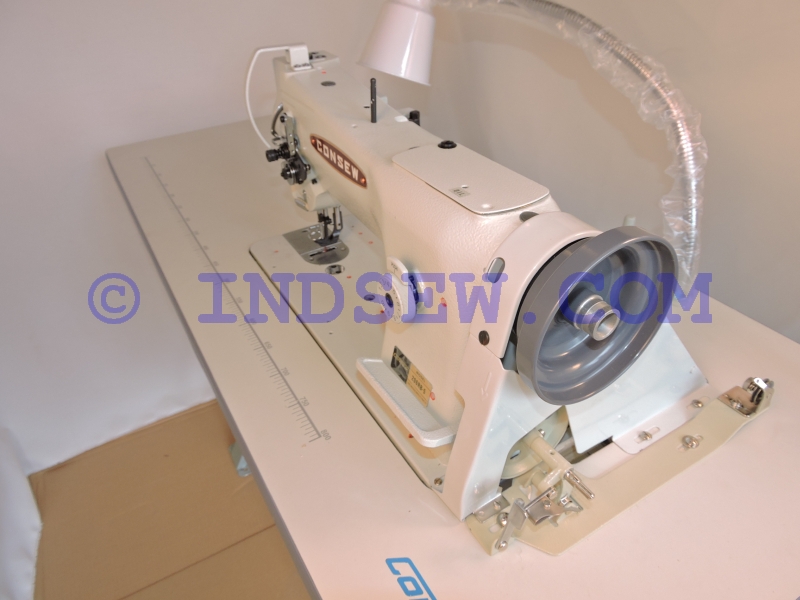
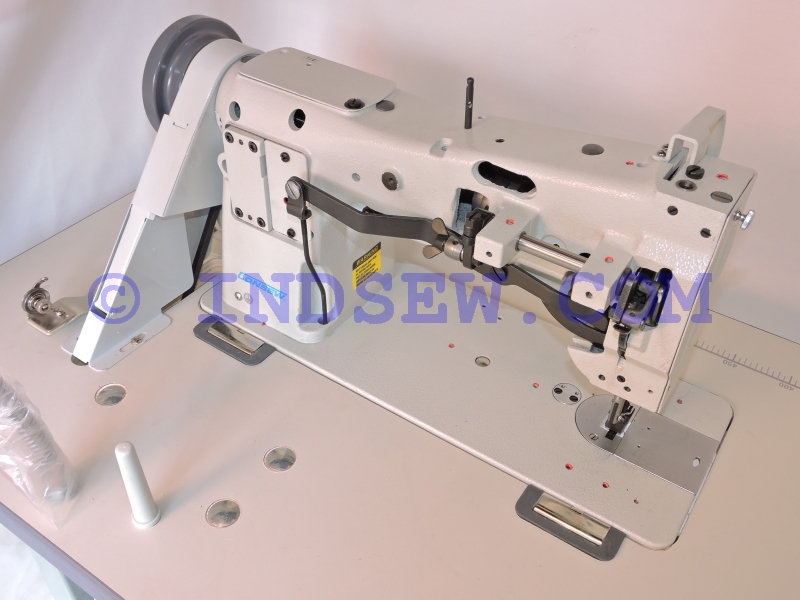
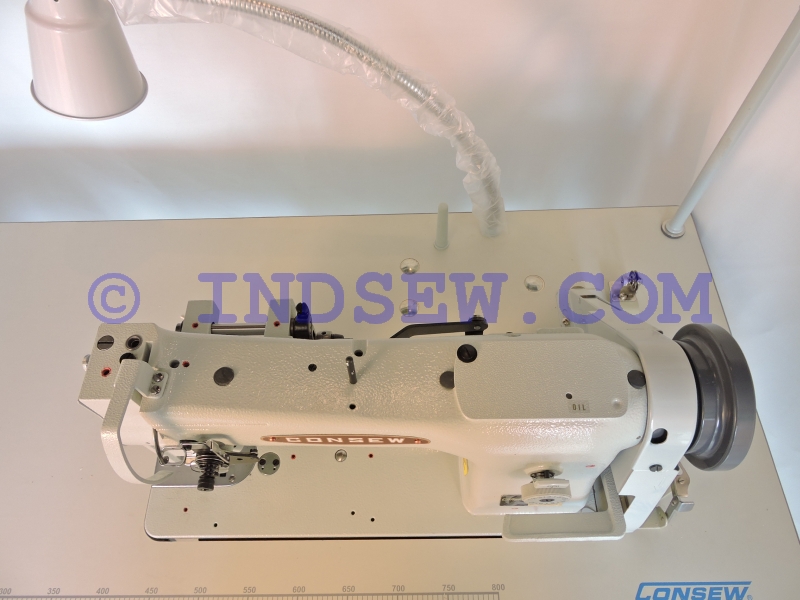
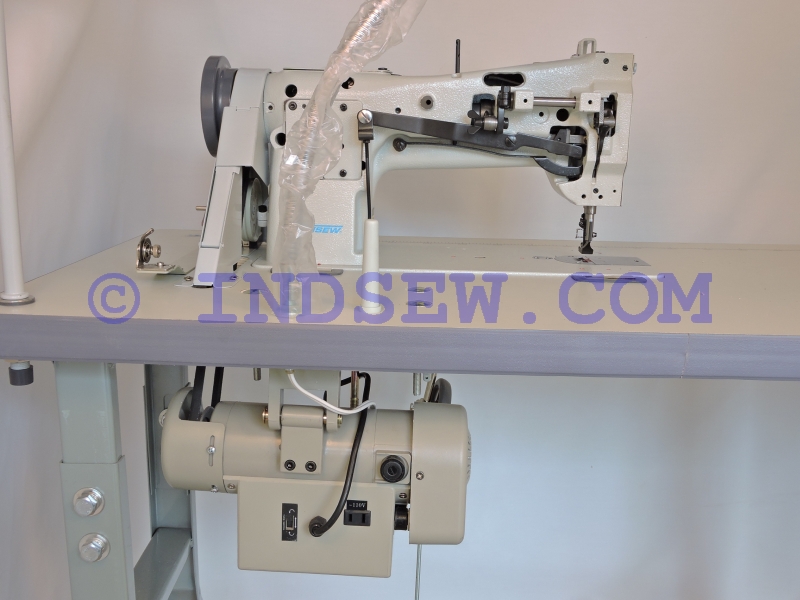
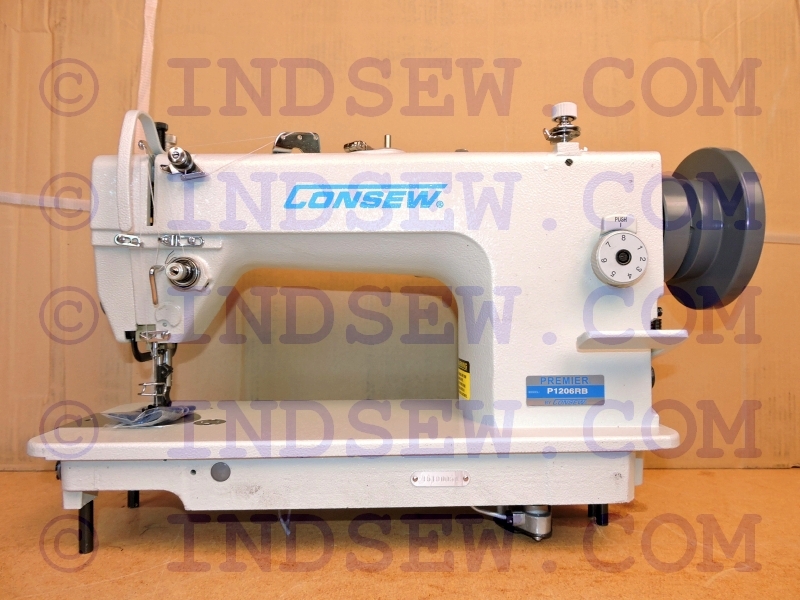
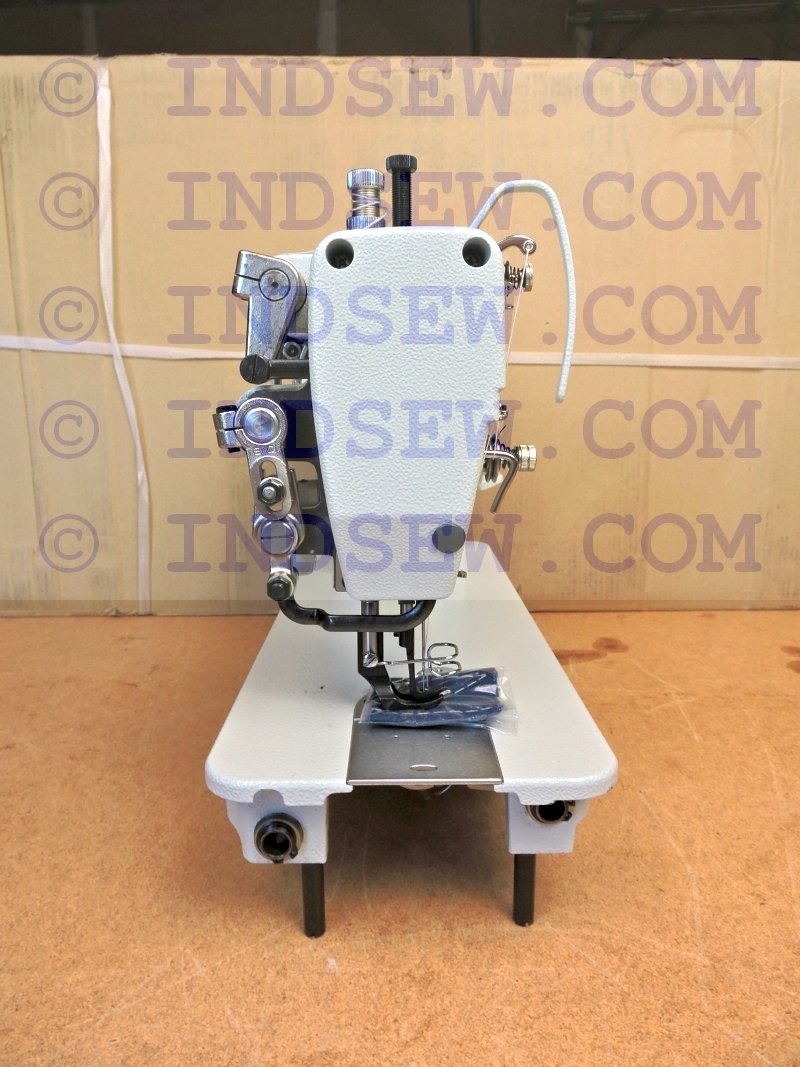
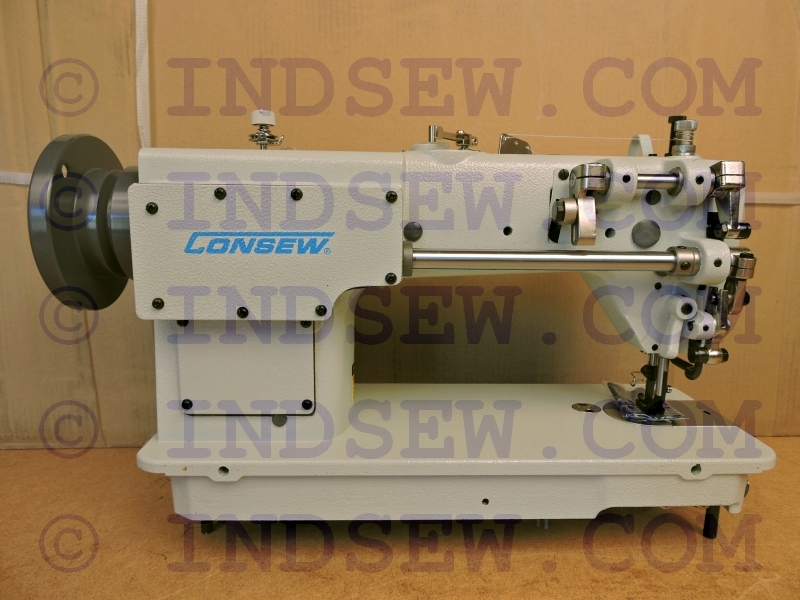
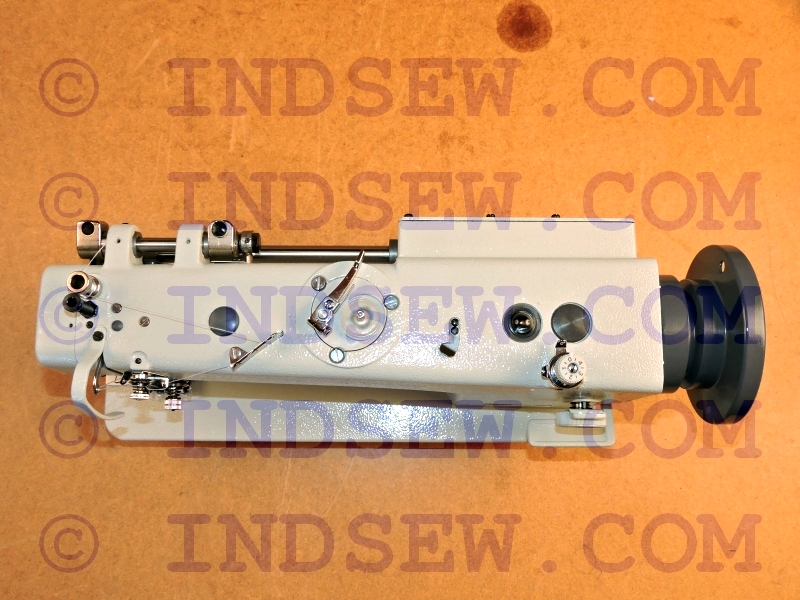
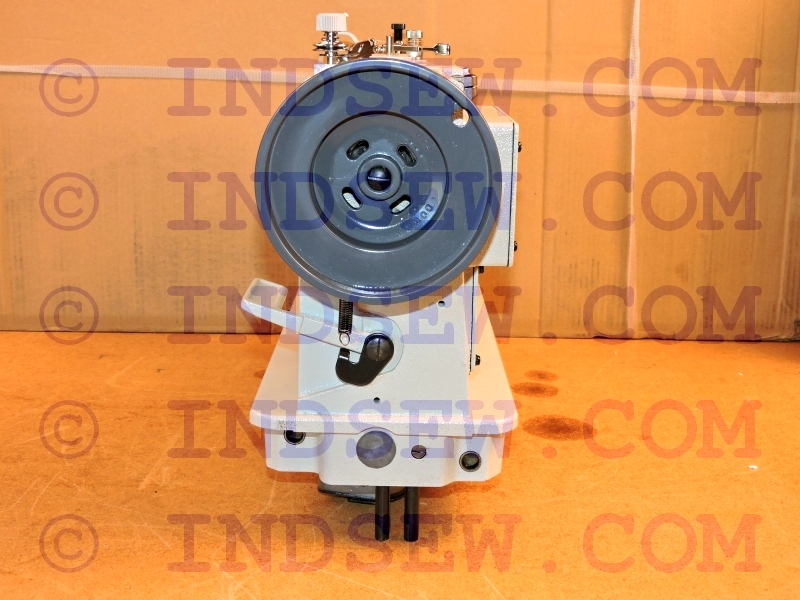
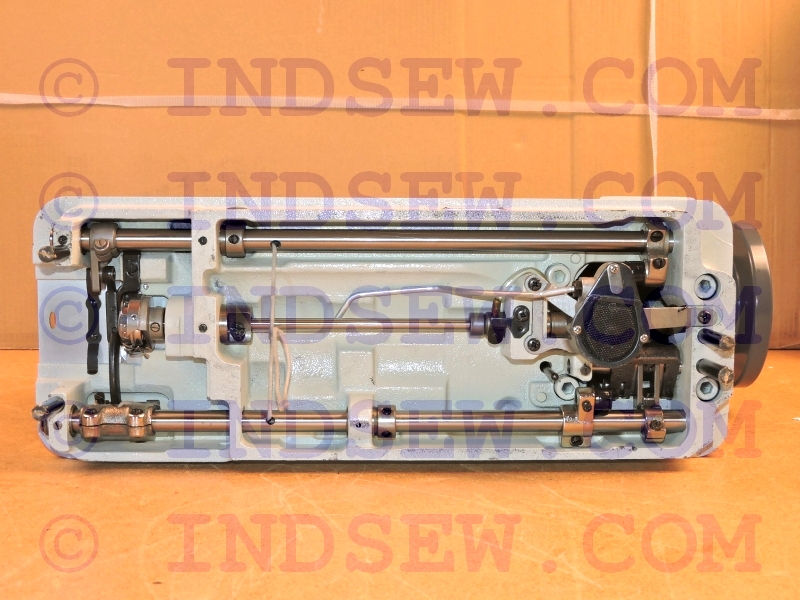
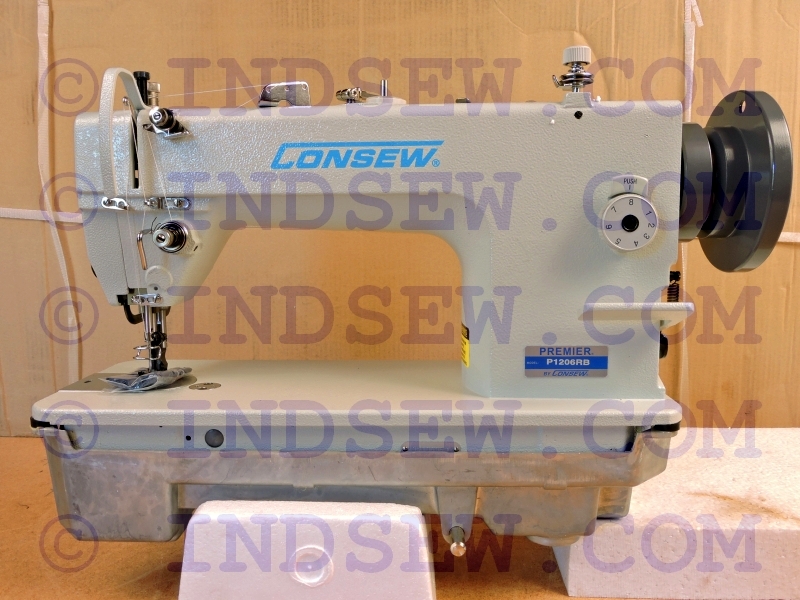
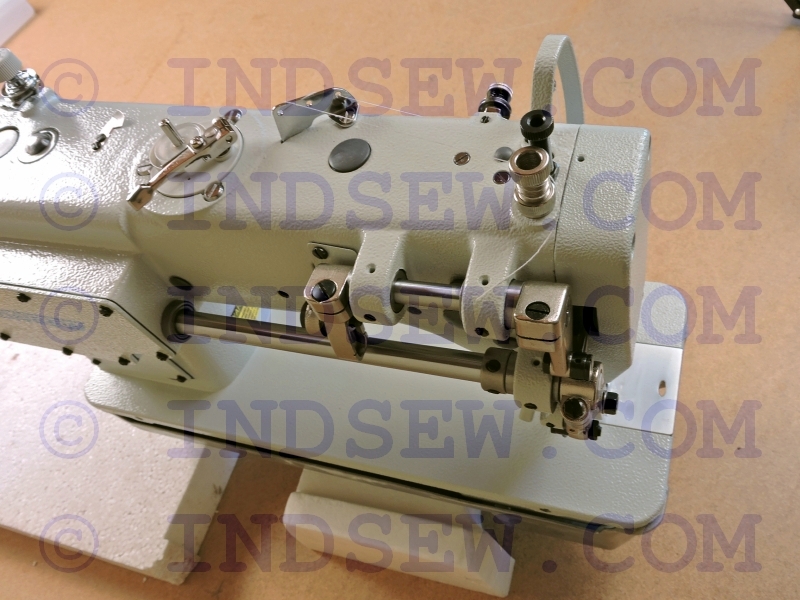
Here are out of the box P1206RB machine head pictures for you reference:
(Click on the images to see a larger picture)
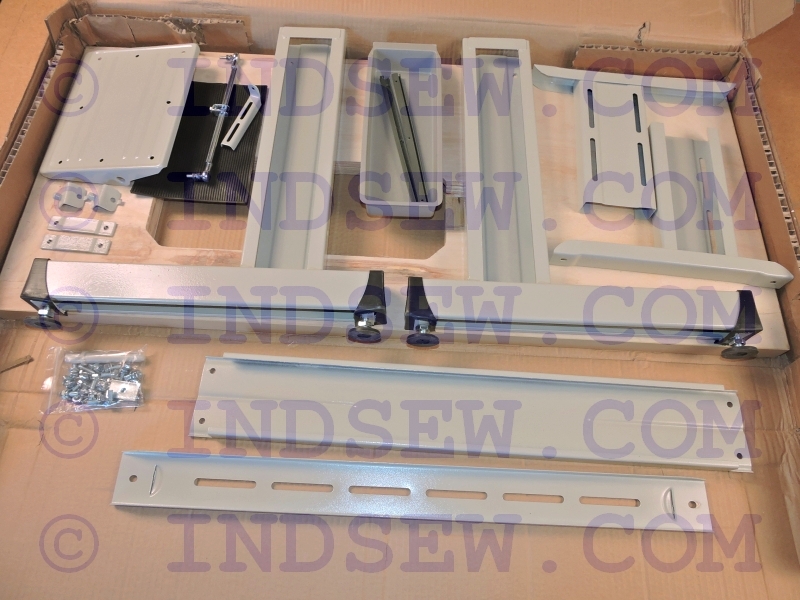
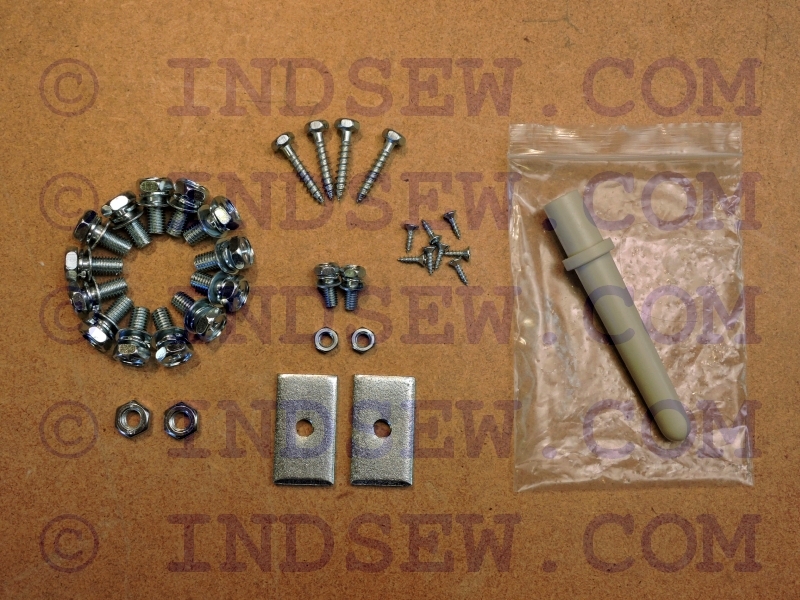
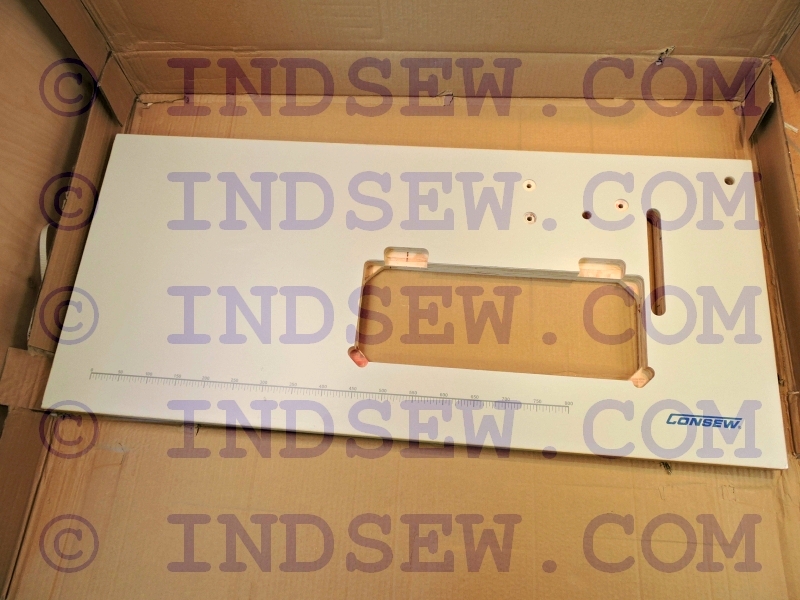
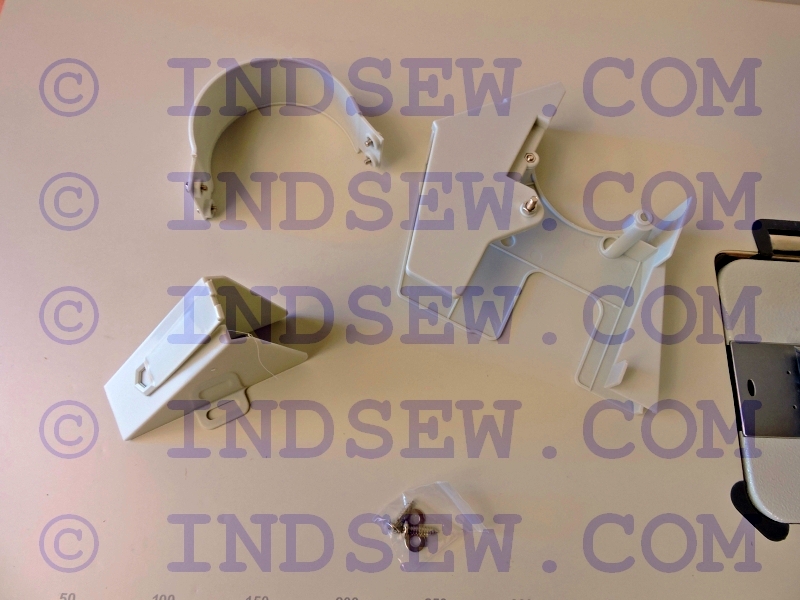
First we assemble the table, here is what is in the boxes:
(Click on the images to see a larger picture)
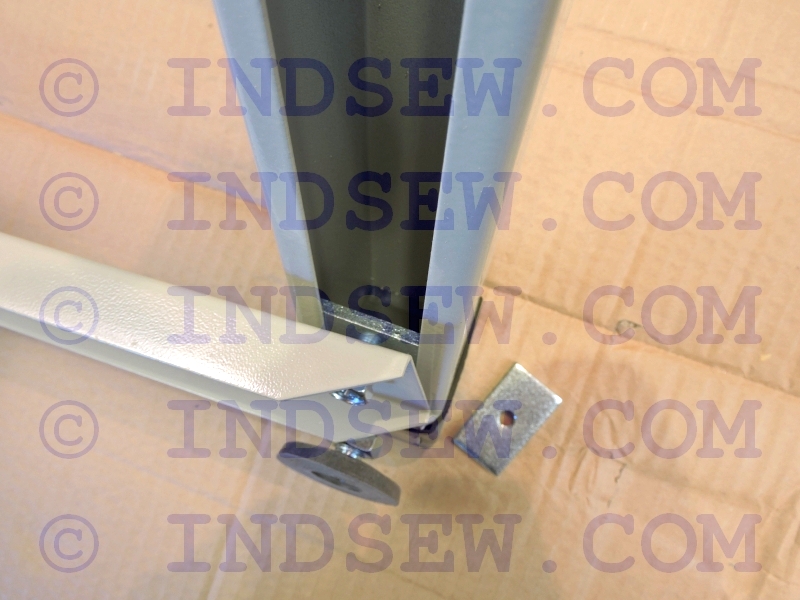
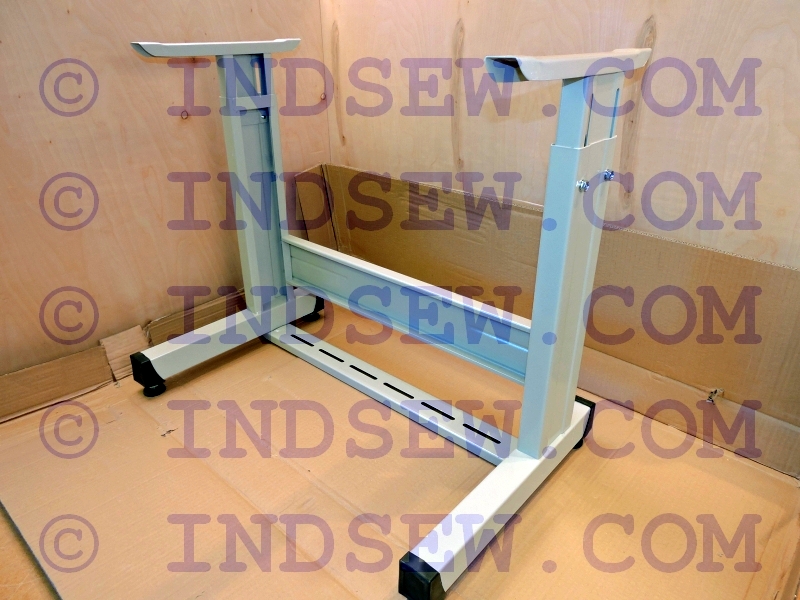
Assembling the table:
(Click on the images to see a larger picture)


Now installing the motor with supplied 3 bolts, washers and nuts in predrilled holes in the table top. Then connecting the motor to the pedal with supplied adjusting rod:
Supplied motors can be different, but they are installed the same way with 3 bolts and then connected with the rod to the pedal.
(Click on the images to see a larger picture)
Now installing the machine head on the table:
(Click on the images to see a larger picture)
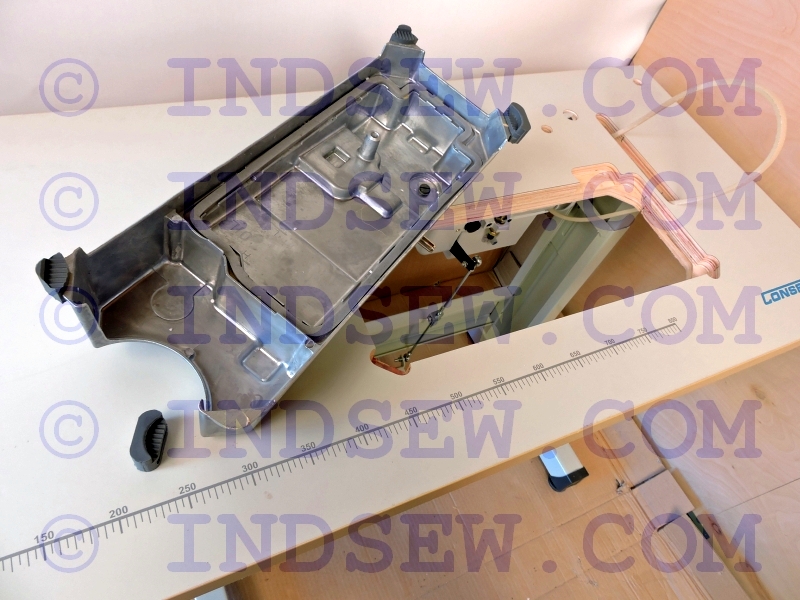
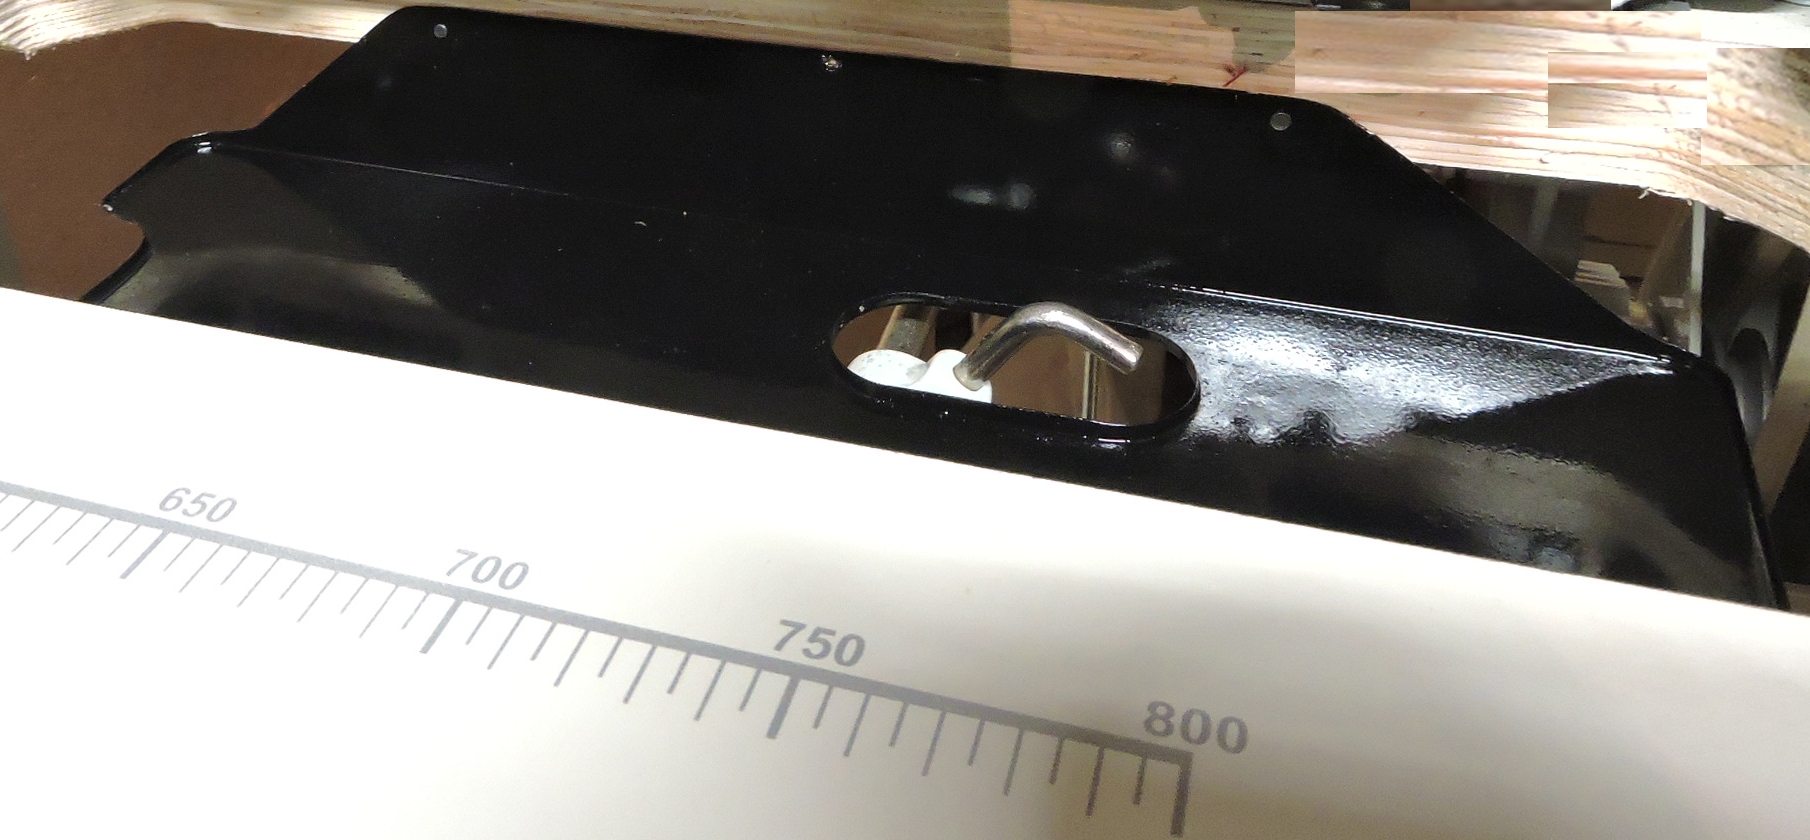
Install knee lever to the bottom of the oil pan and the black color knee lifter pin inside the oil pan:
(Click on the images to see a larger picture)

In predrilled holes on the table top attach with supplied washers and nuts: Lamp, Thread stand and insert Head rest support.
(Click on the images to see a larger picture)
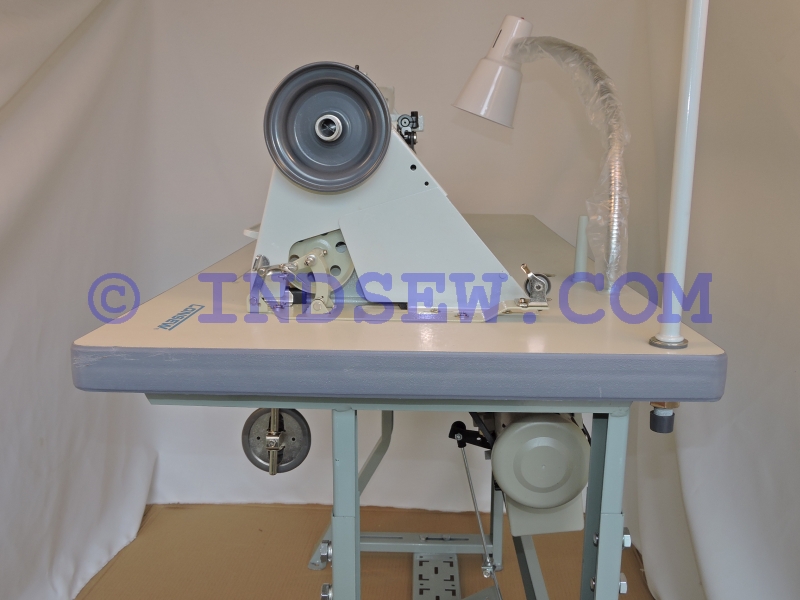
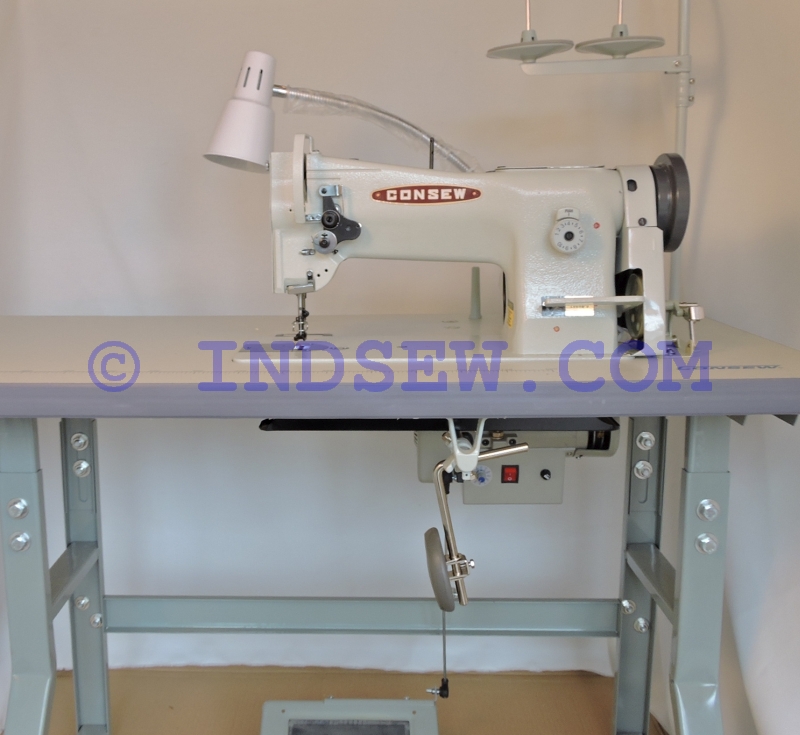
Installation complete:
(Click on the images to see a larger picture)
Consew 206RB-5 foot pushing back material issue fix - adjustment
Back To The Top
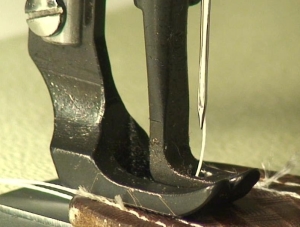
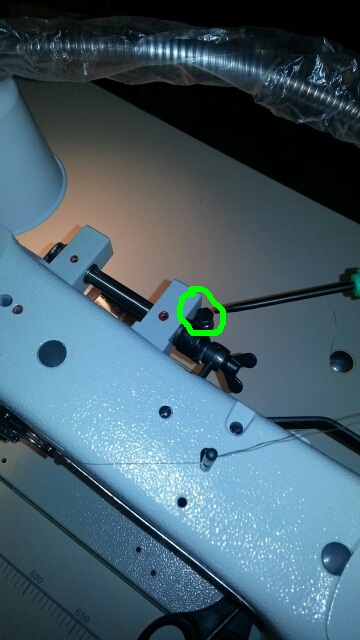
When you experience an issue with material being pushed back before it is fed forward by the walking foot the walking motion of your machine may need adjustment.
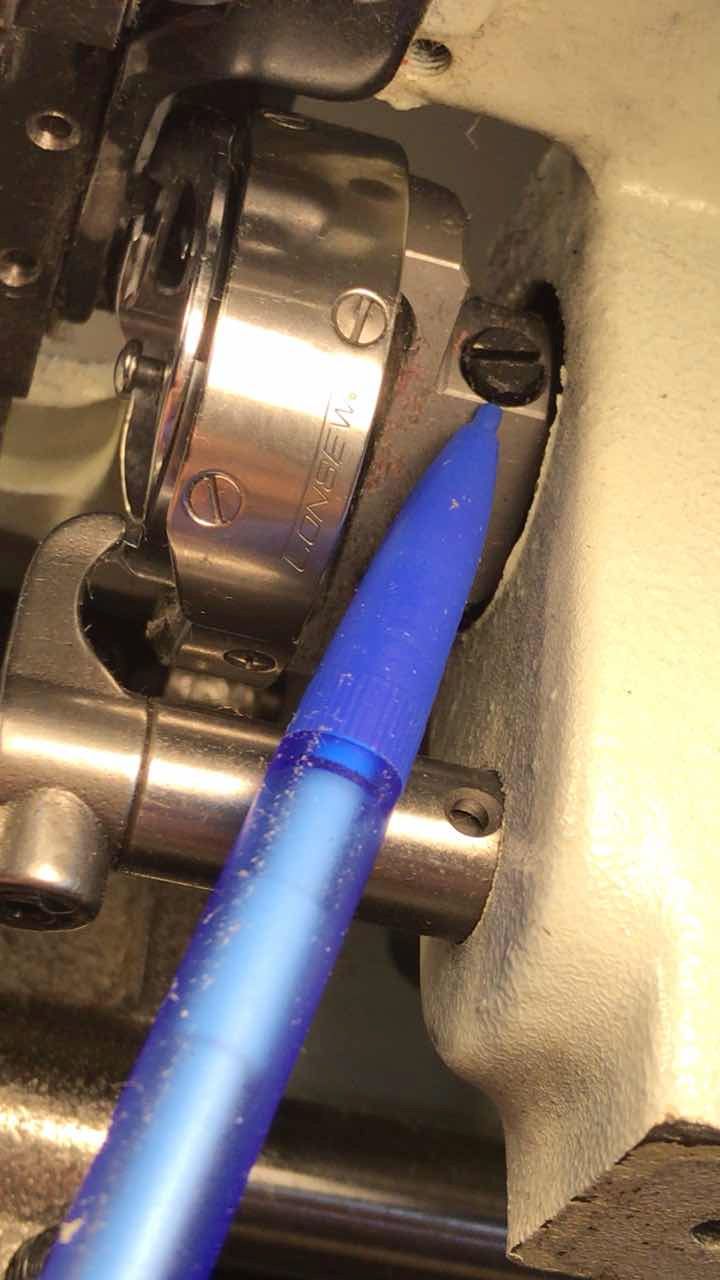
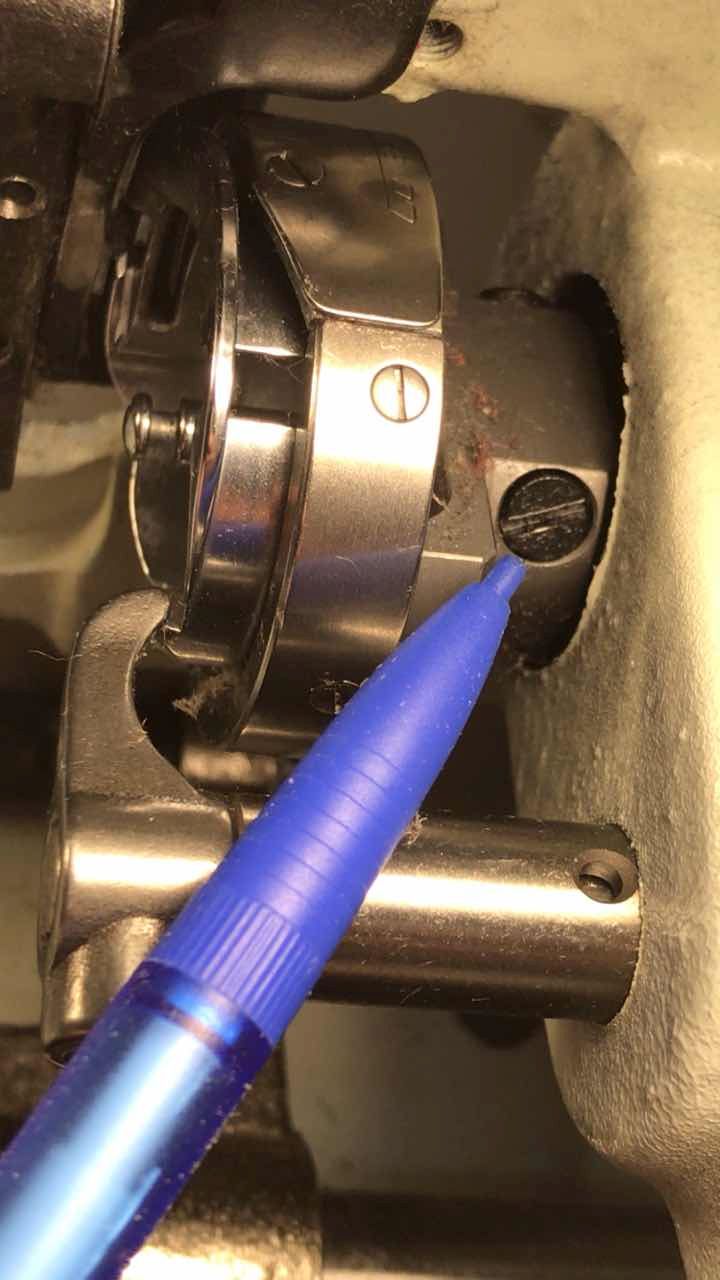
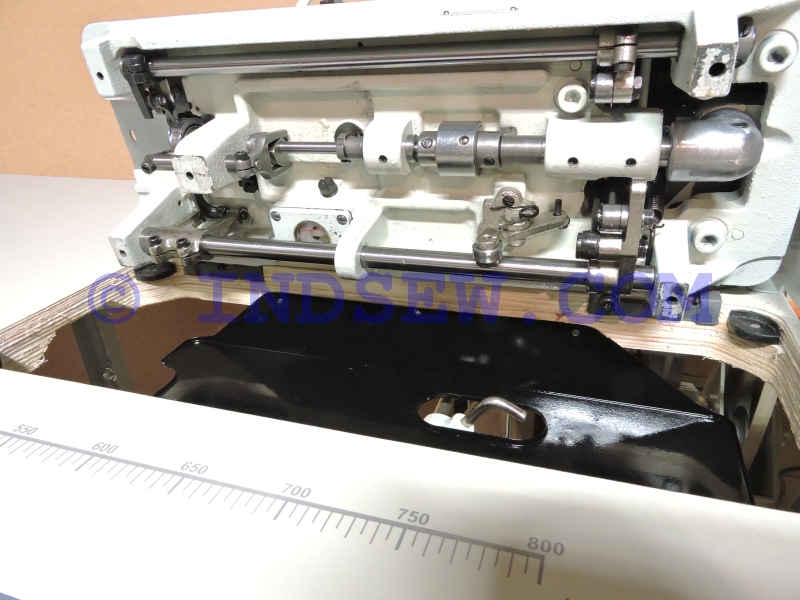
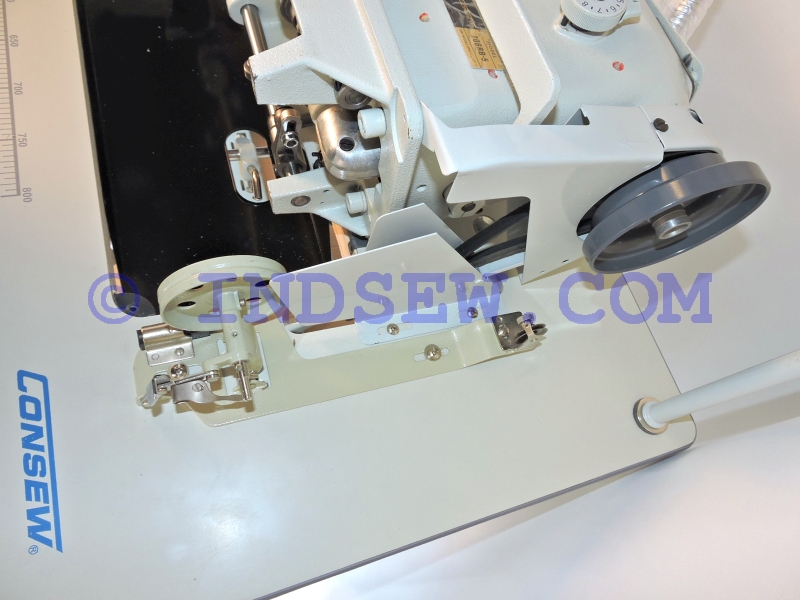
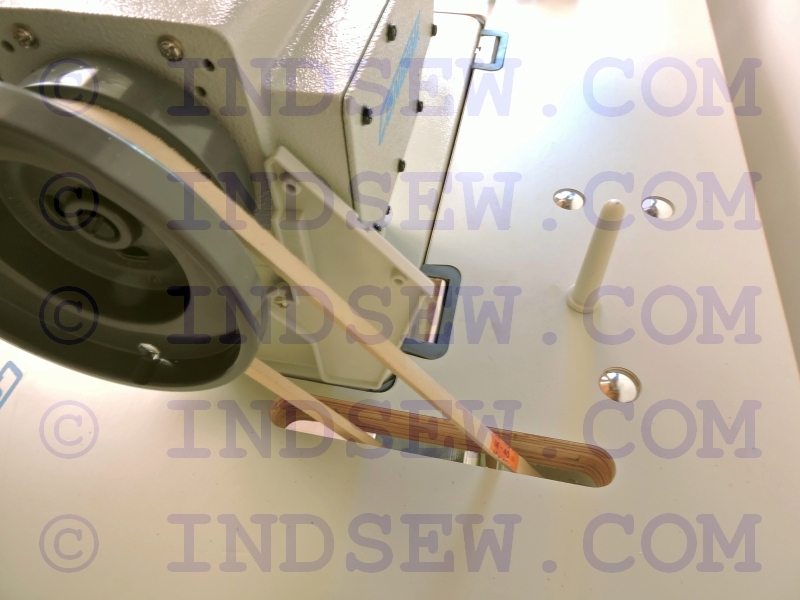
This issue is caused by walking foot landing too early, as it is still travels forward to it's front most position. To fix this problem - lower the presser foot and then lower the walking foot by spinning the wheel until it is as close to the front as it gets. Now slightly release the screw shown on the picture and tighten it back. It will adjust the timing of the walking foot reaching the front and landing simultaneously. Problem solved.
(Click on the images to see a larger picture)
_______________________________________
Industrial sewing machines
Back To The Top
_______________________________________
|


